Bluetooth Audio Receiver with PCM5102A

Bluetooth Audio Receiver mit PCM5102A

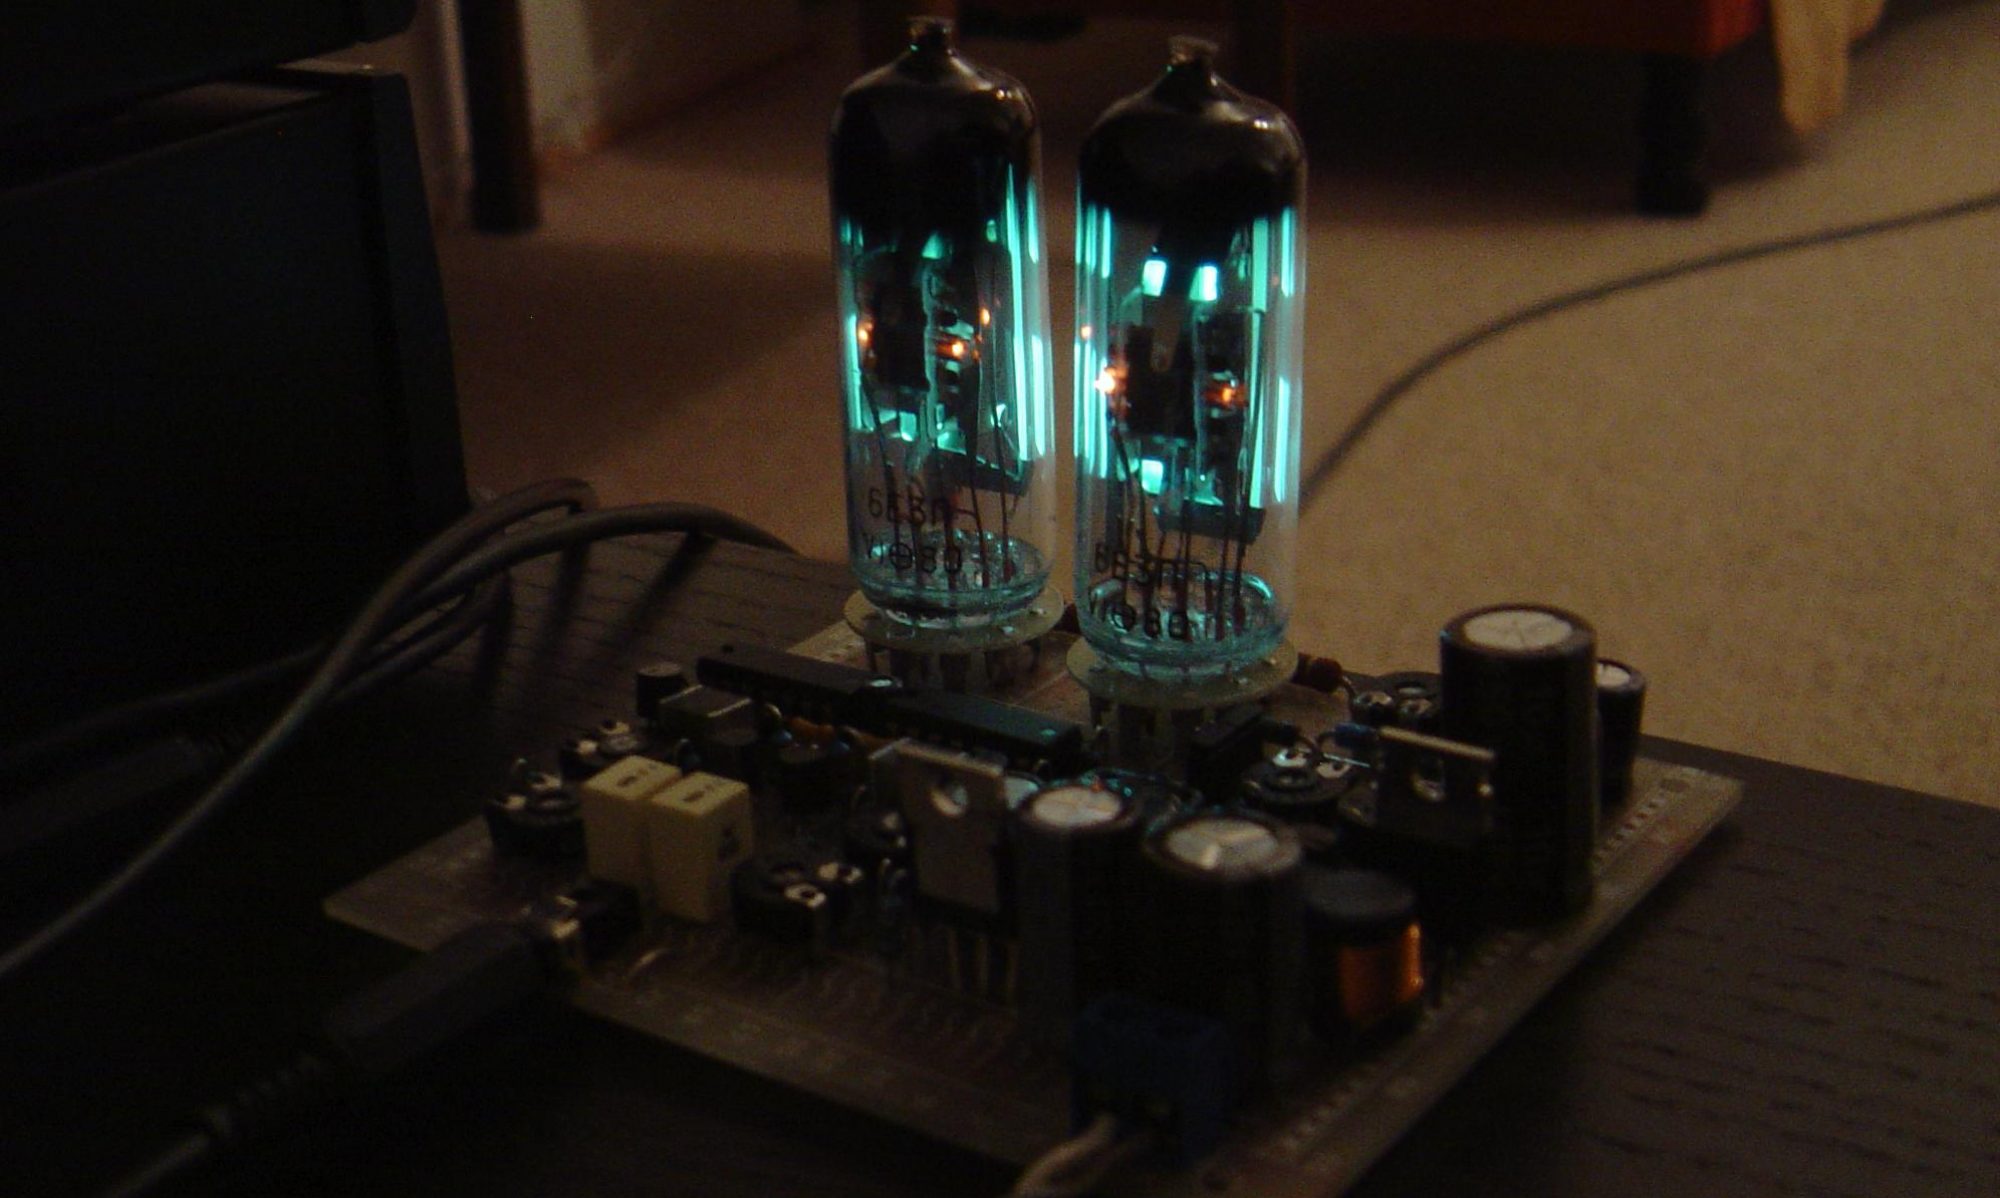
We have a receiver in our living room that is almost exactly 50 years old. The Sony STR-V5 has a lot of oomph, is wired with wire-wrap connections like earlier space technology and will certainly work for another 50 years. The only problem was that its cinch inputs are no longer compatible with current devices that transmit wirelessly. This gave rise to the idea of building a slightly better Bluetooth receiver for the Sony with a matching retro look. The end result can already be seen here.

Receiver betriebsbereit
receiver ready

Bluetooth-Audio

Before this project, I had no idea about bluetooth. In my mind, it sounded pretty easy to transfer the audio and then play it back. Unfortunately, it’s not quite like that. Due to the limited data rate of a Bluetooth wireless connection, the data must be compressed. A “codec” does this. Of course, it has to be the same on the sending and receiving side. The oldest and currently the most widely used codecs are “AAC” and “SBC”. Audiophile users were not satisfied with the quality of this compression, so a number of new standards are trying to enter the market. In addition to “SBC” and “AAC”, “aptX”, “aptX HD” and “LDAC” are now also competing for the customer’s favor. Don’t forget: sender and receiver must support the same codec. For example, if you buy Bluetooth headphones with “aptX”, but the receiver speaks “LDAC”, only a connection with “SBC” is established, if it works at all.

Overall, the Bluetooth standard is quite complex and my interest in delving further into it is limited. The software uses “SBC”, which is supported by almost all devices.

Volume control

While programming, I noticed that the volume control with Bluetooth is the crux of the matter. The basic problem is that the audio samples are transmitted with 16 bits and usually 100% volume. In the receiver, the volume is now reduced to say 35%. That means we have to divide the audio samples roughly by 16. As a result, we have audio data with a resolution of only 12 bits. And that’s exactly how it sounds.

A simple solution to the problem is a 32 bit D/A converter. The received 16 bit samples are converted into 32 bit values ​​by simply adding zeros. It doesn’t make a difference at first. In the second step, however, we can calculate the volume with the 32-bit value and then send it directly to the D/A converter. As a result, there is no loss of information at low volume, the 16-bit information is retained.

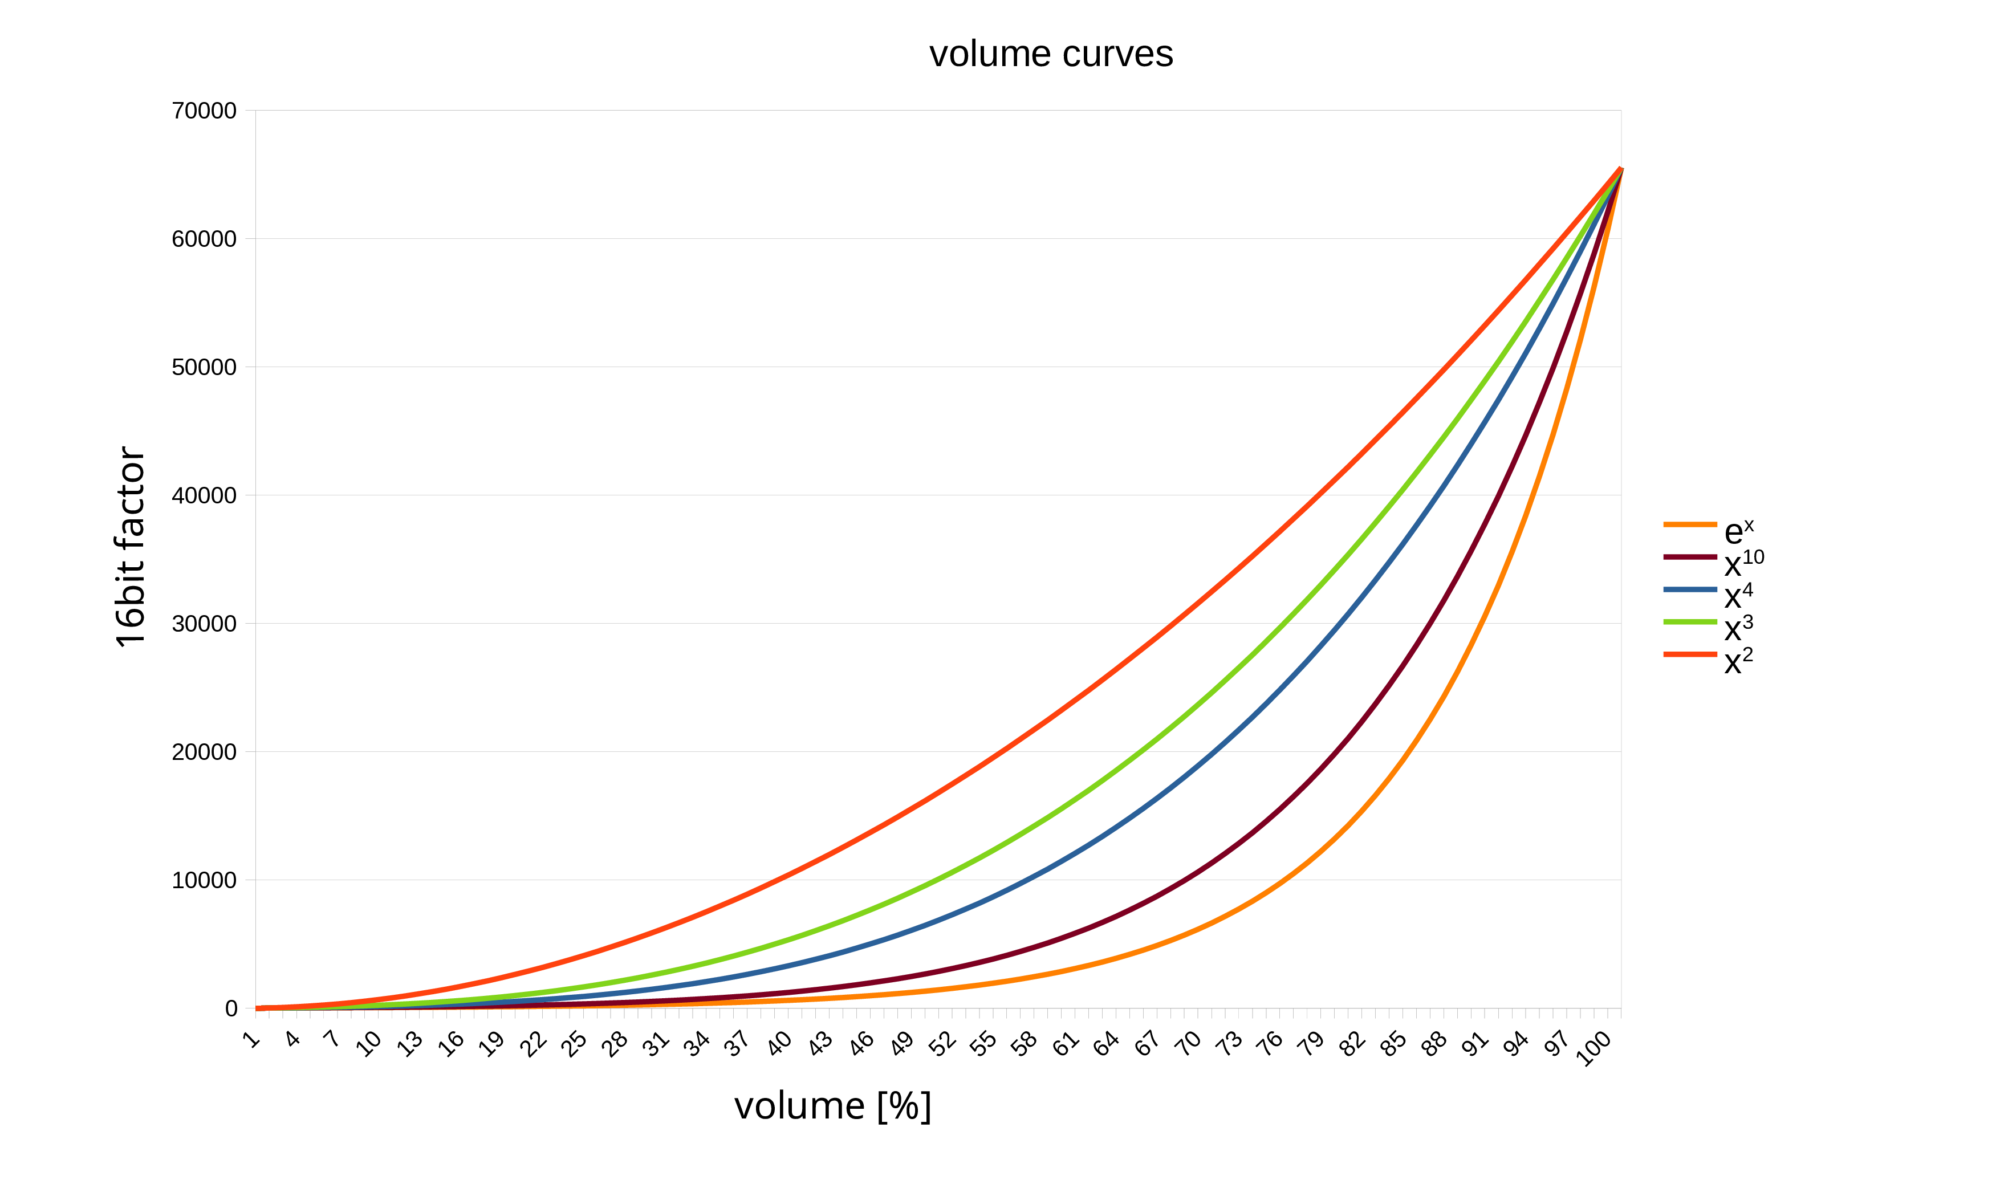
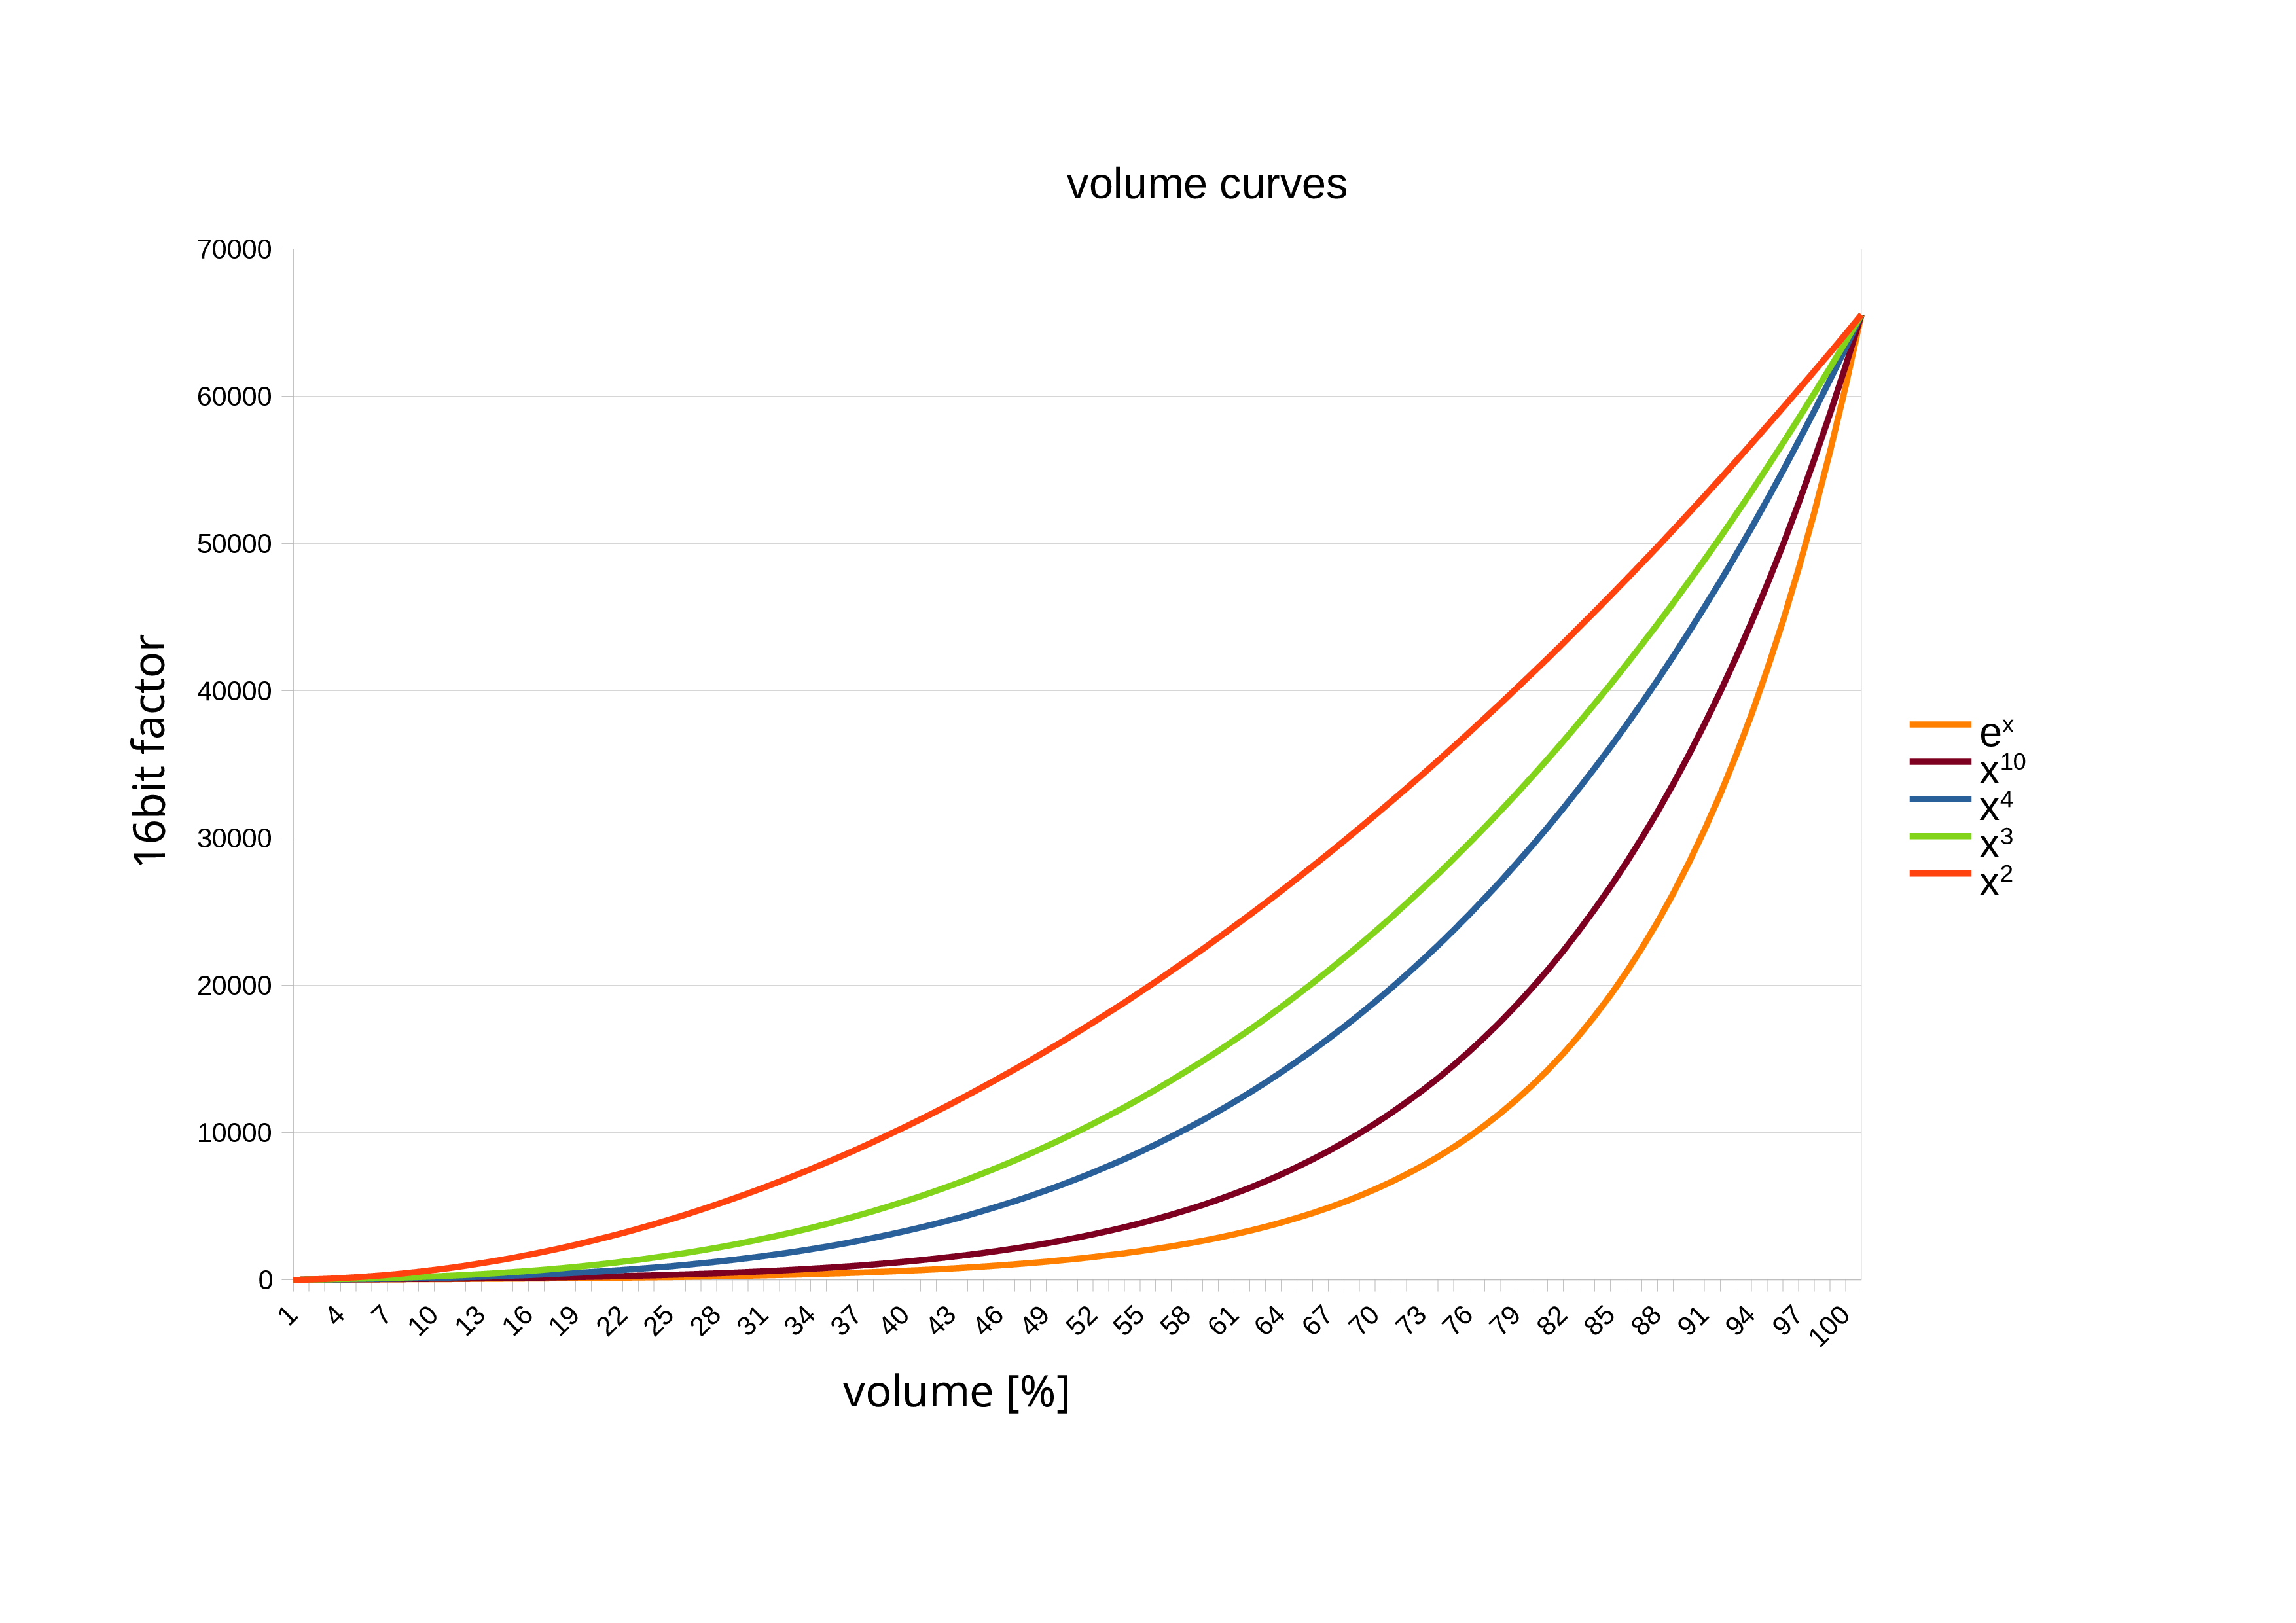
I recently wrote an article about the secrets of a pleasant volume control.

Components

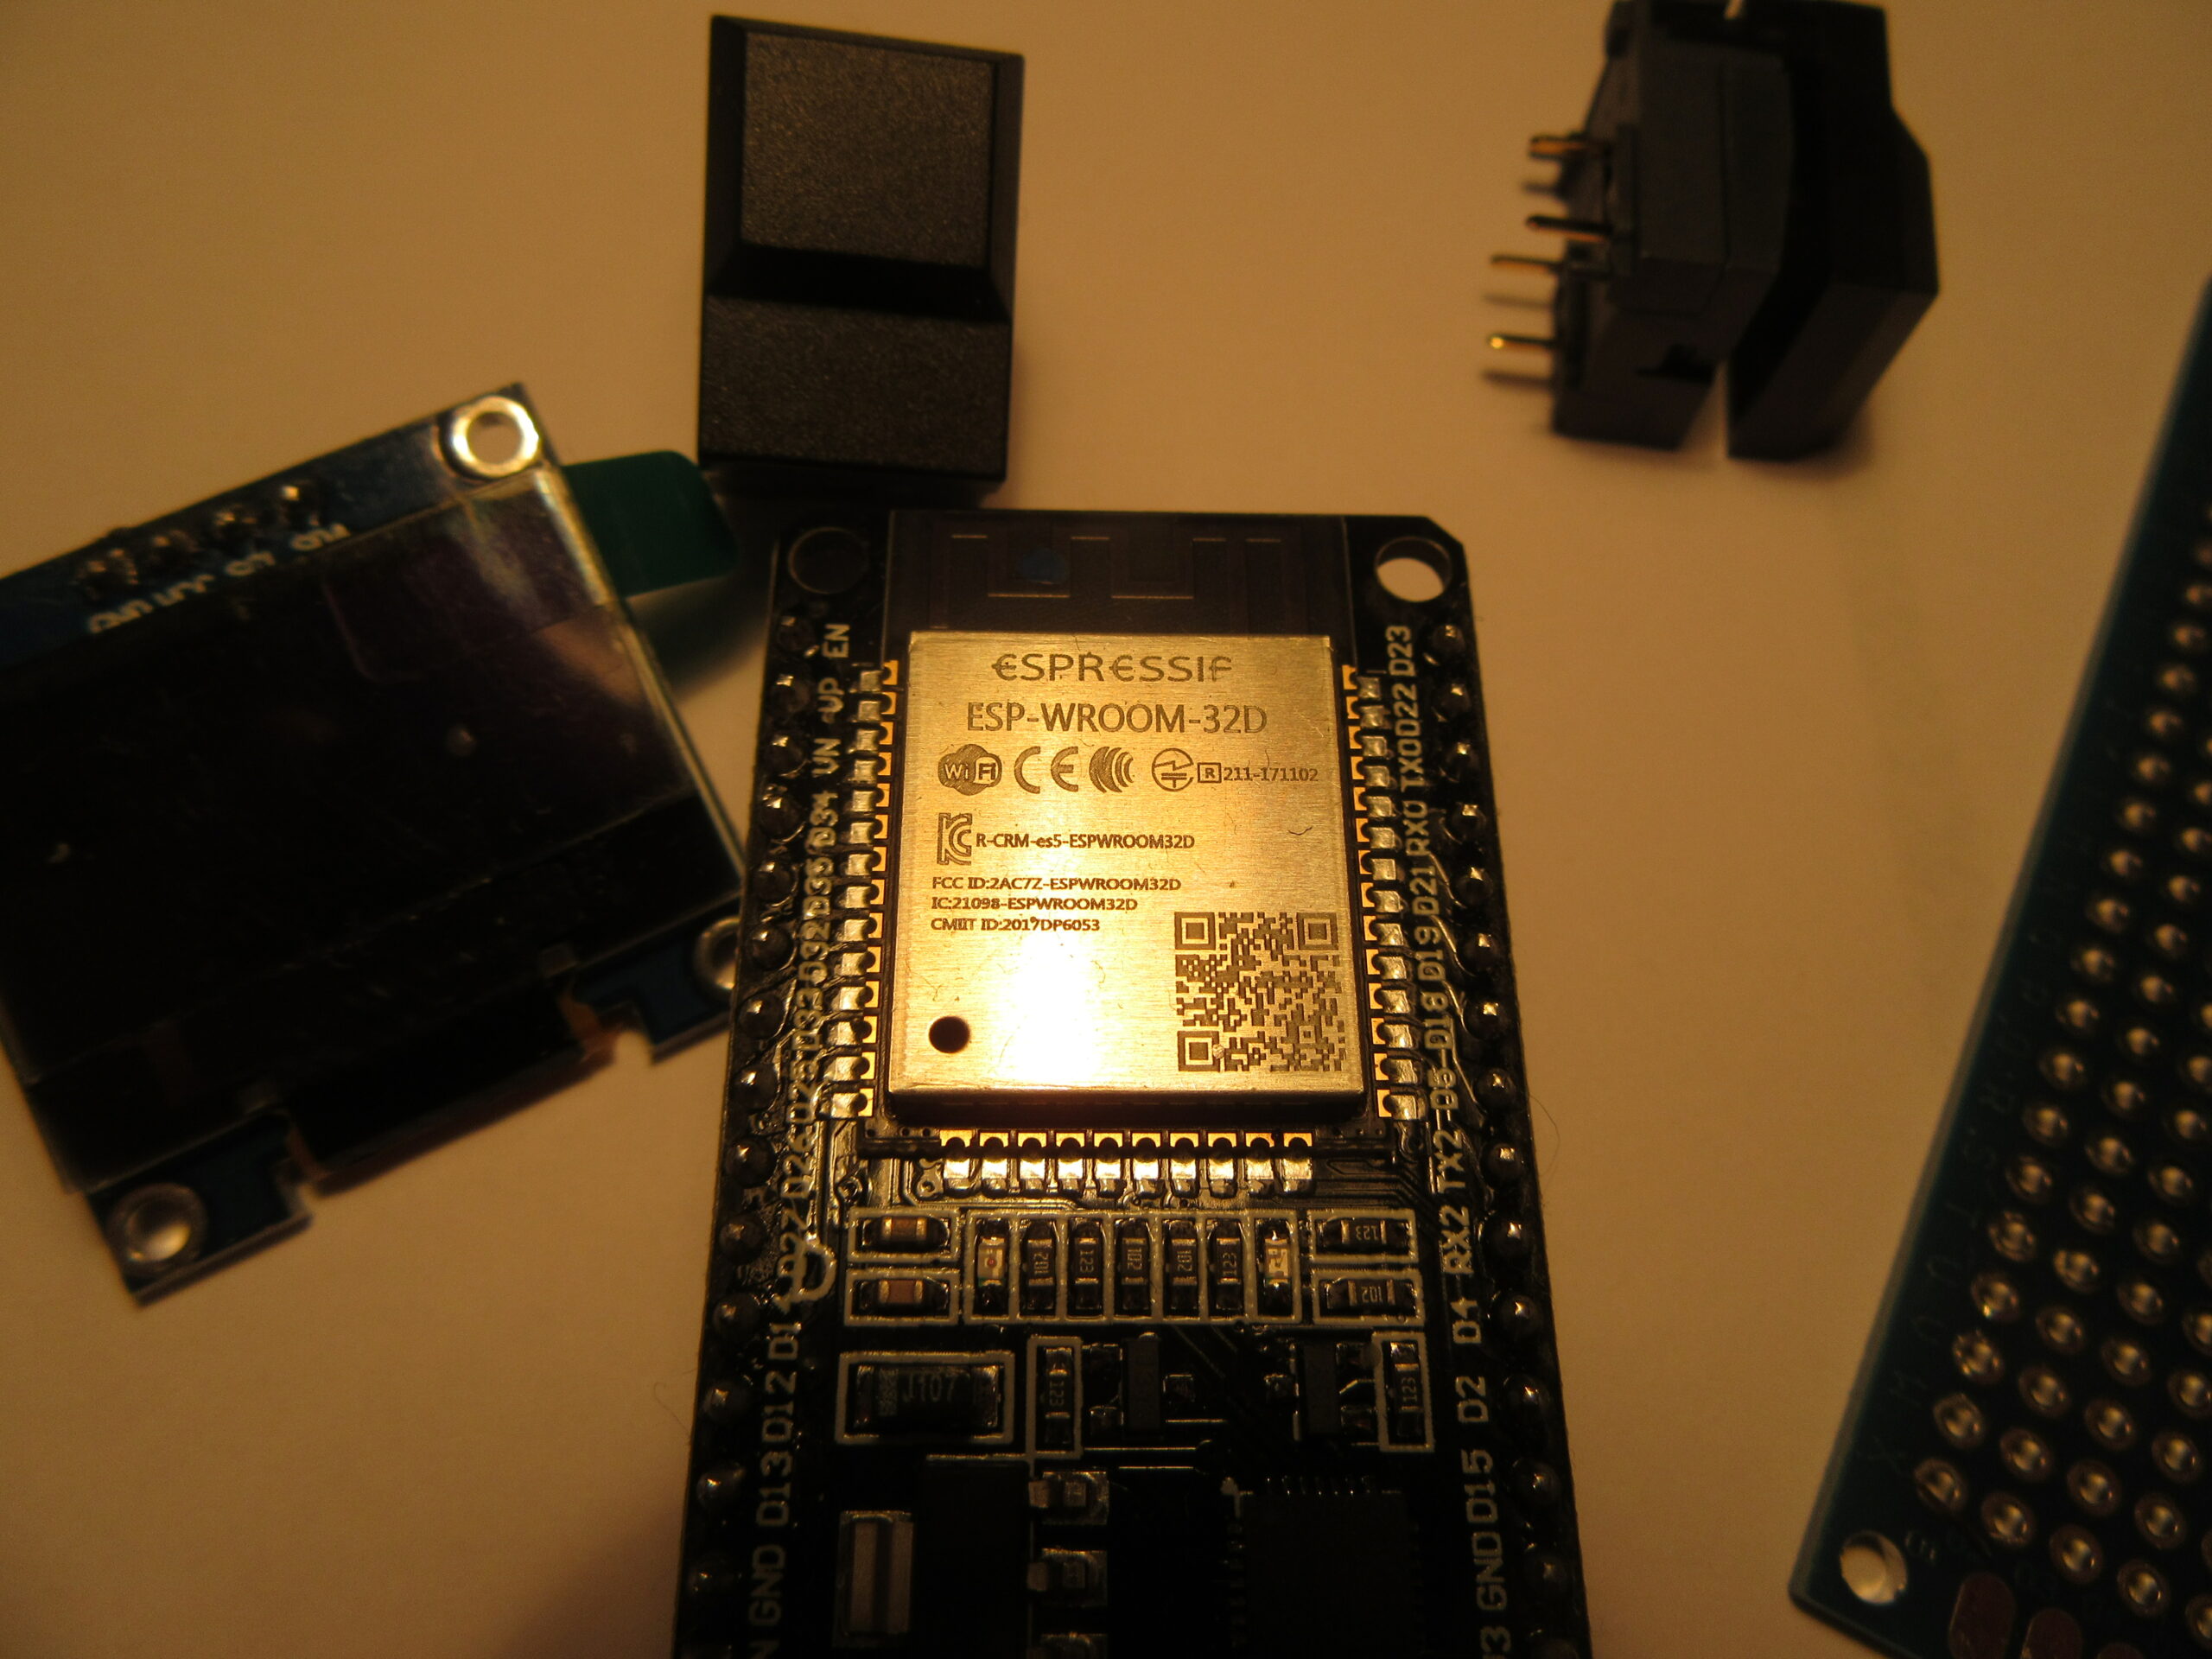
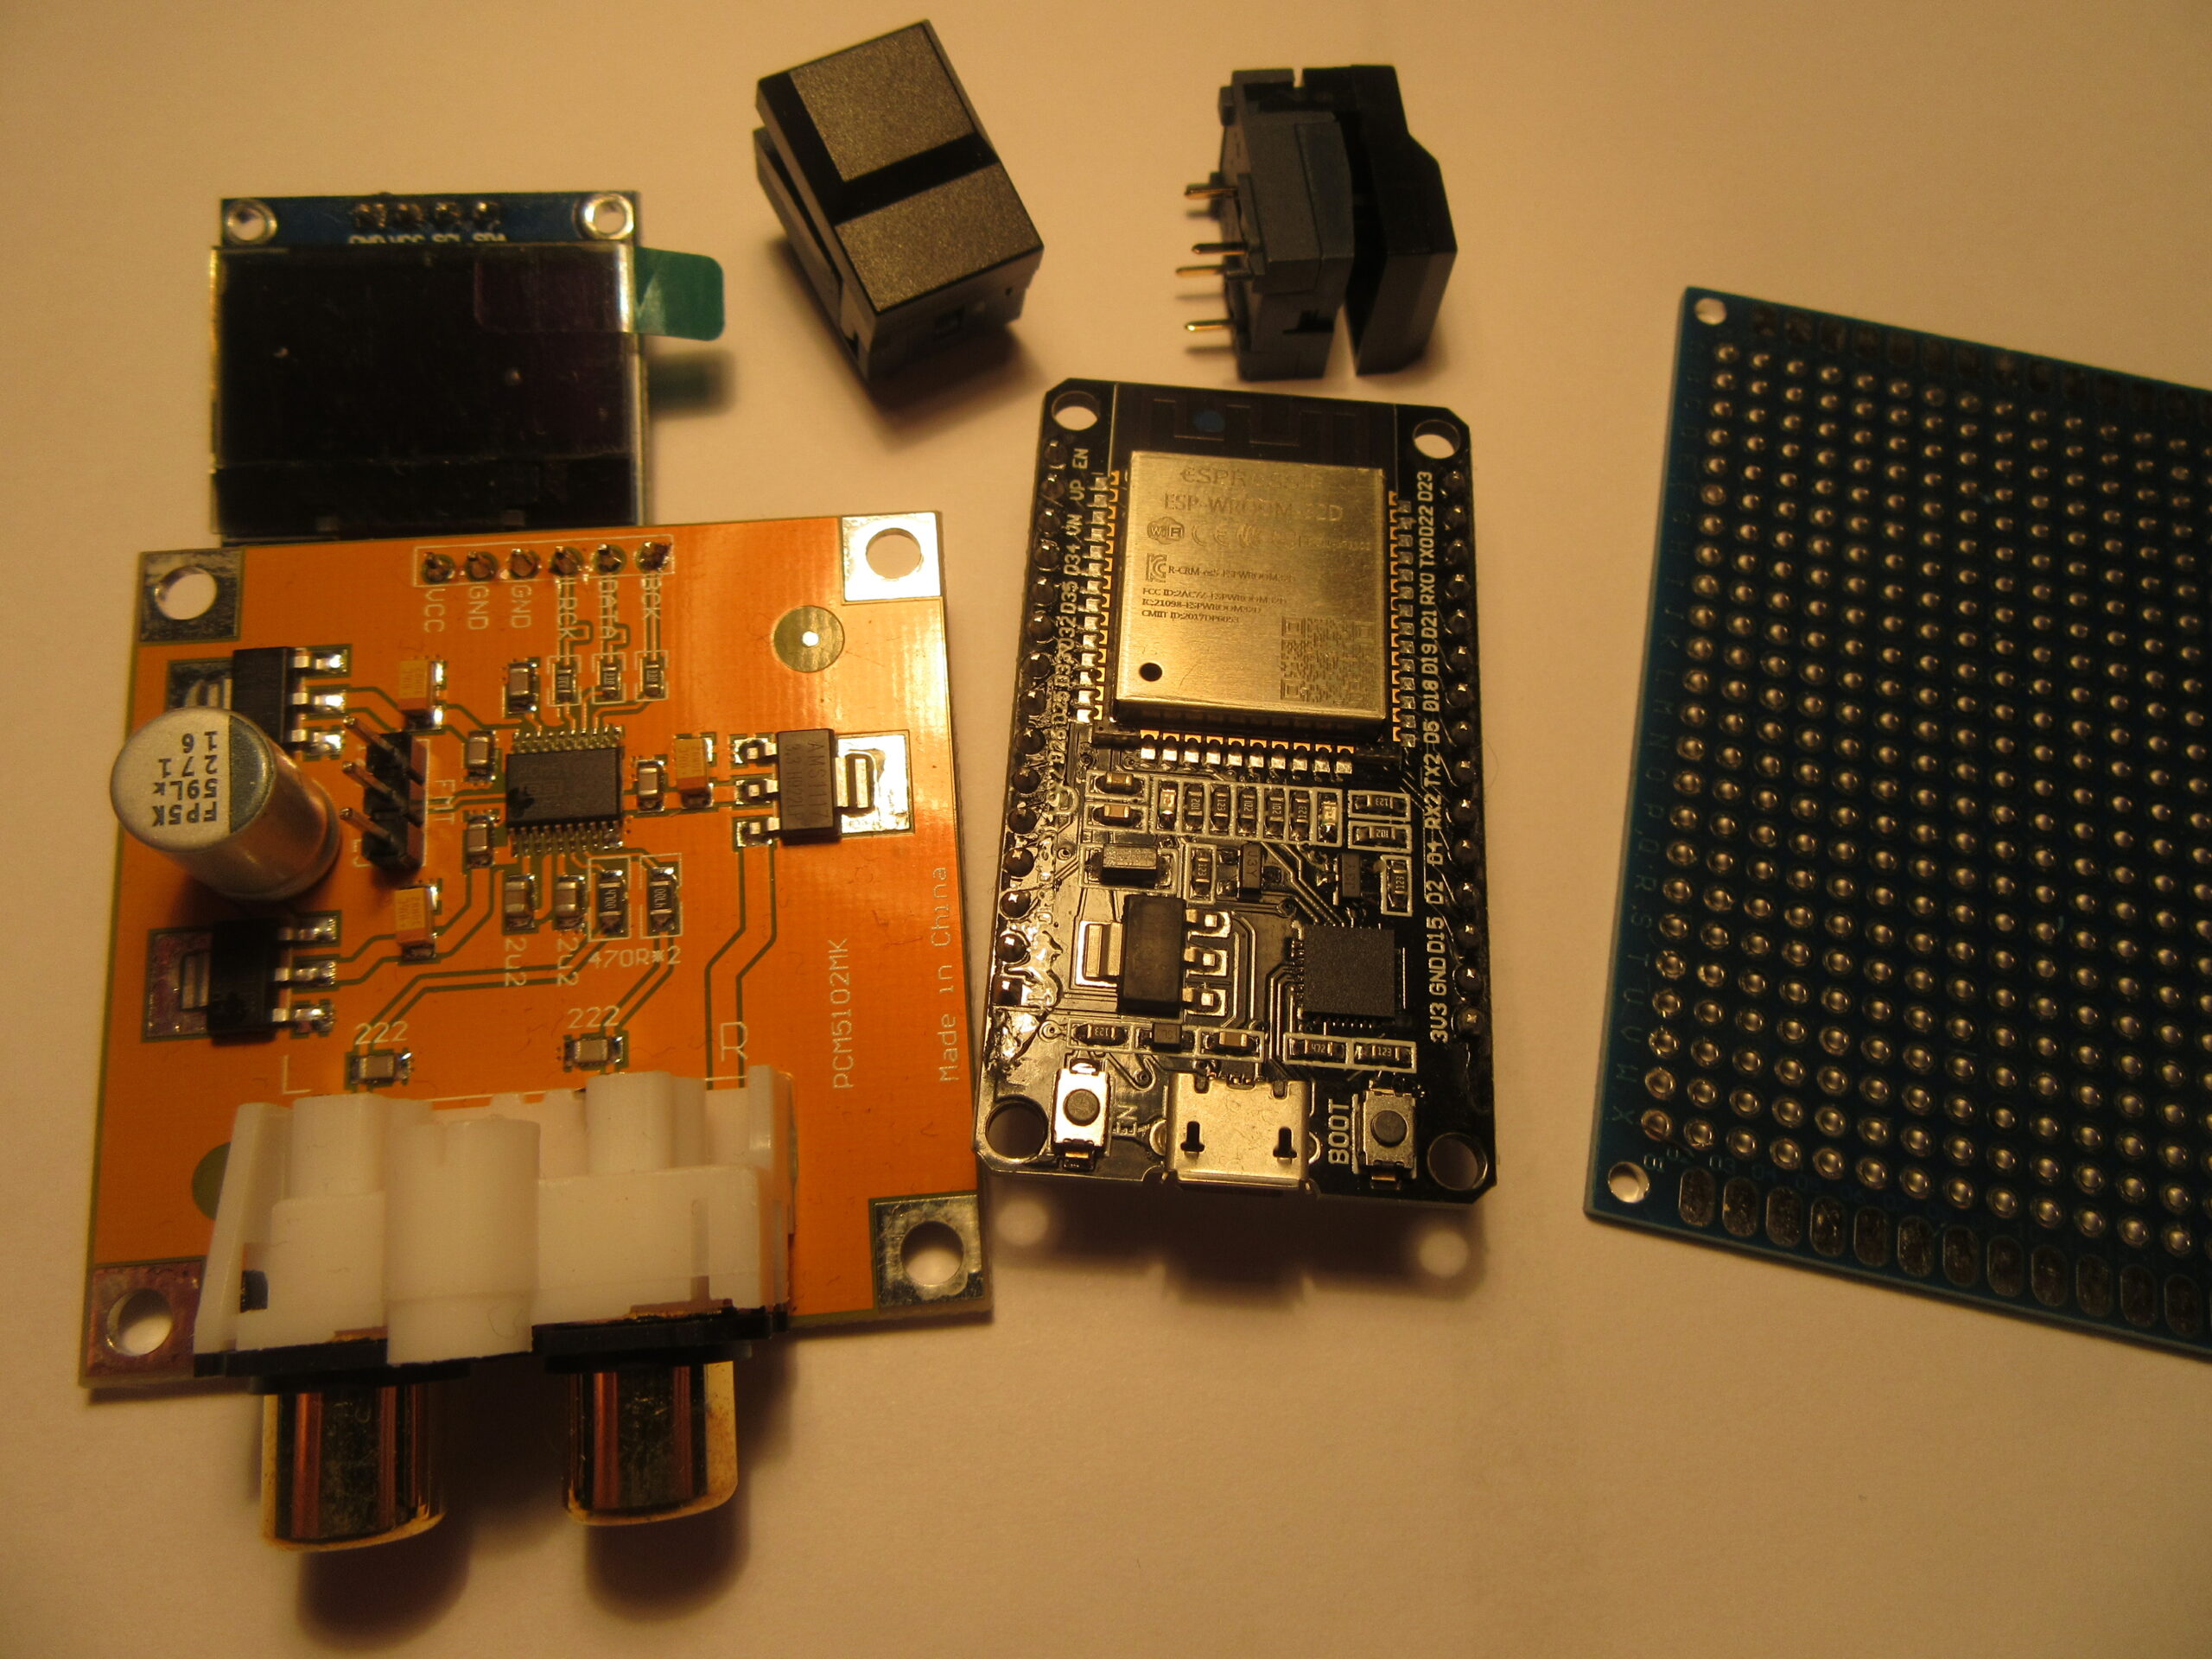
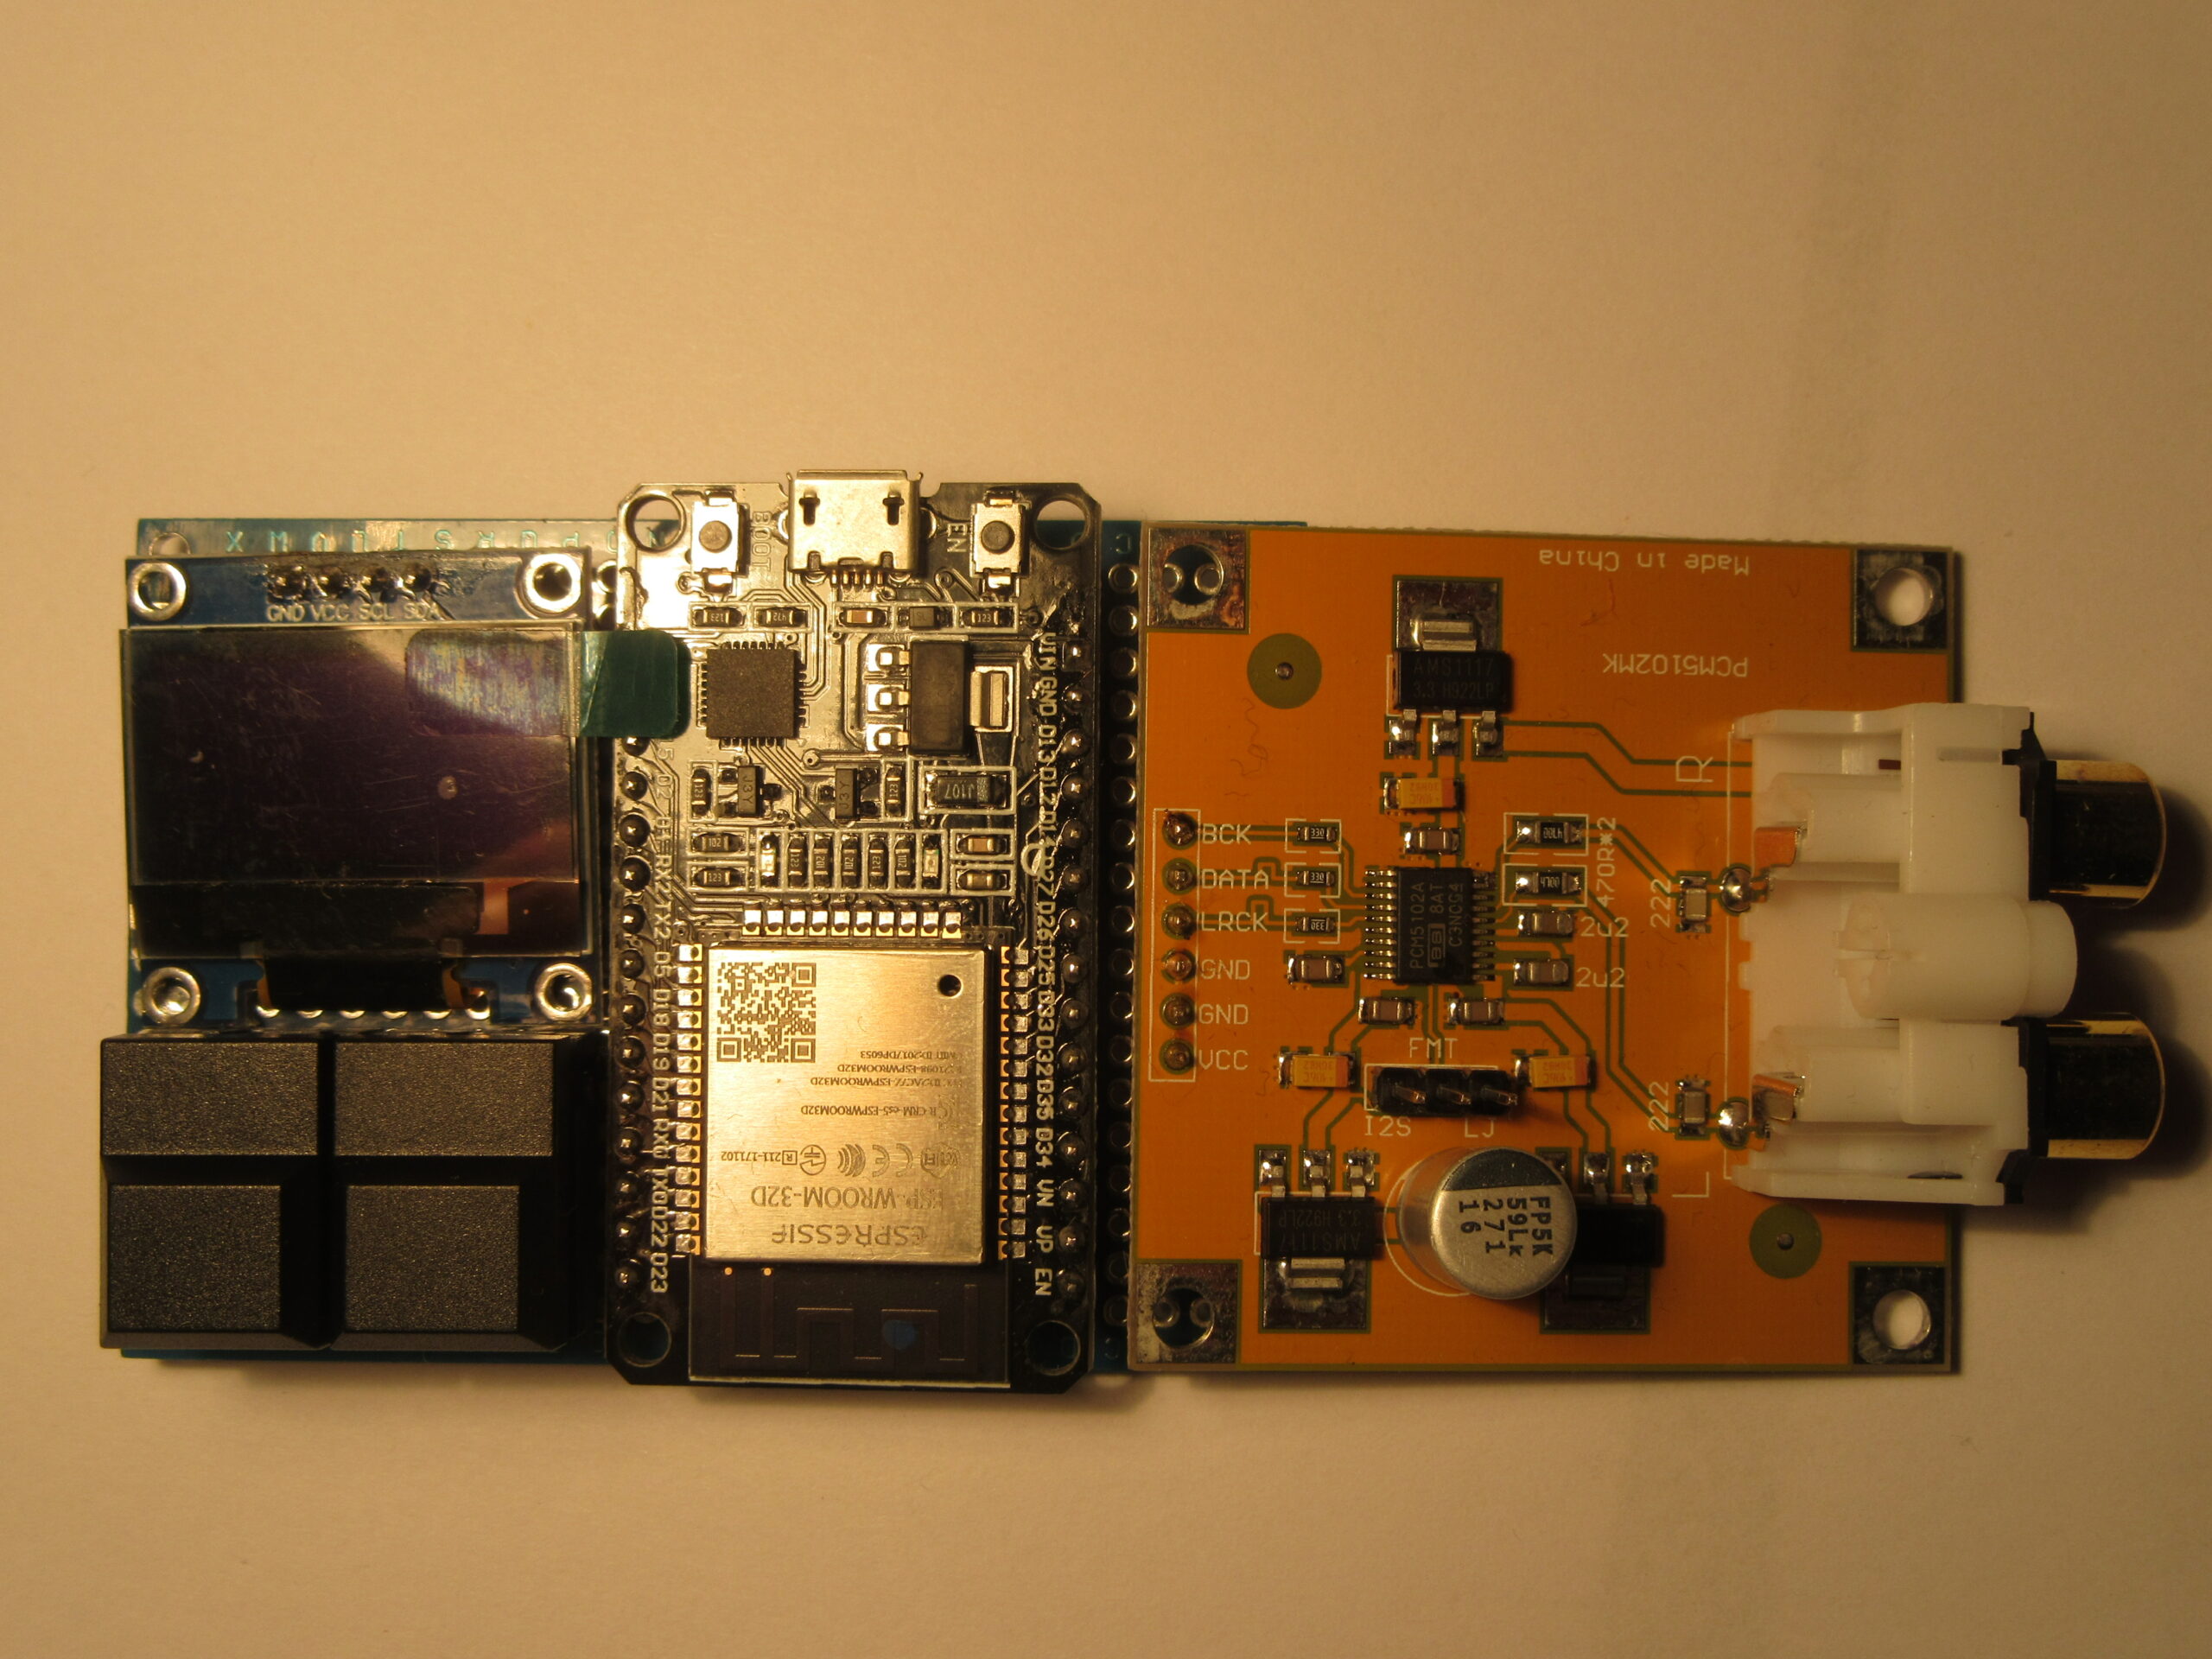
The heart of the circuit is an ESP32 microcontroller from Espressif. The system not only offers plenty of computing power for 3.50 euros, but is also energy-saving. There are a lot of code examples from the manufacturer and lively discussions in forums, which make application development and troubleshooting easier.

ESP-WROOM-32D Modul
ESP-WROOM-32D module

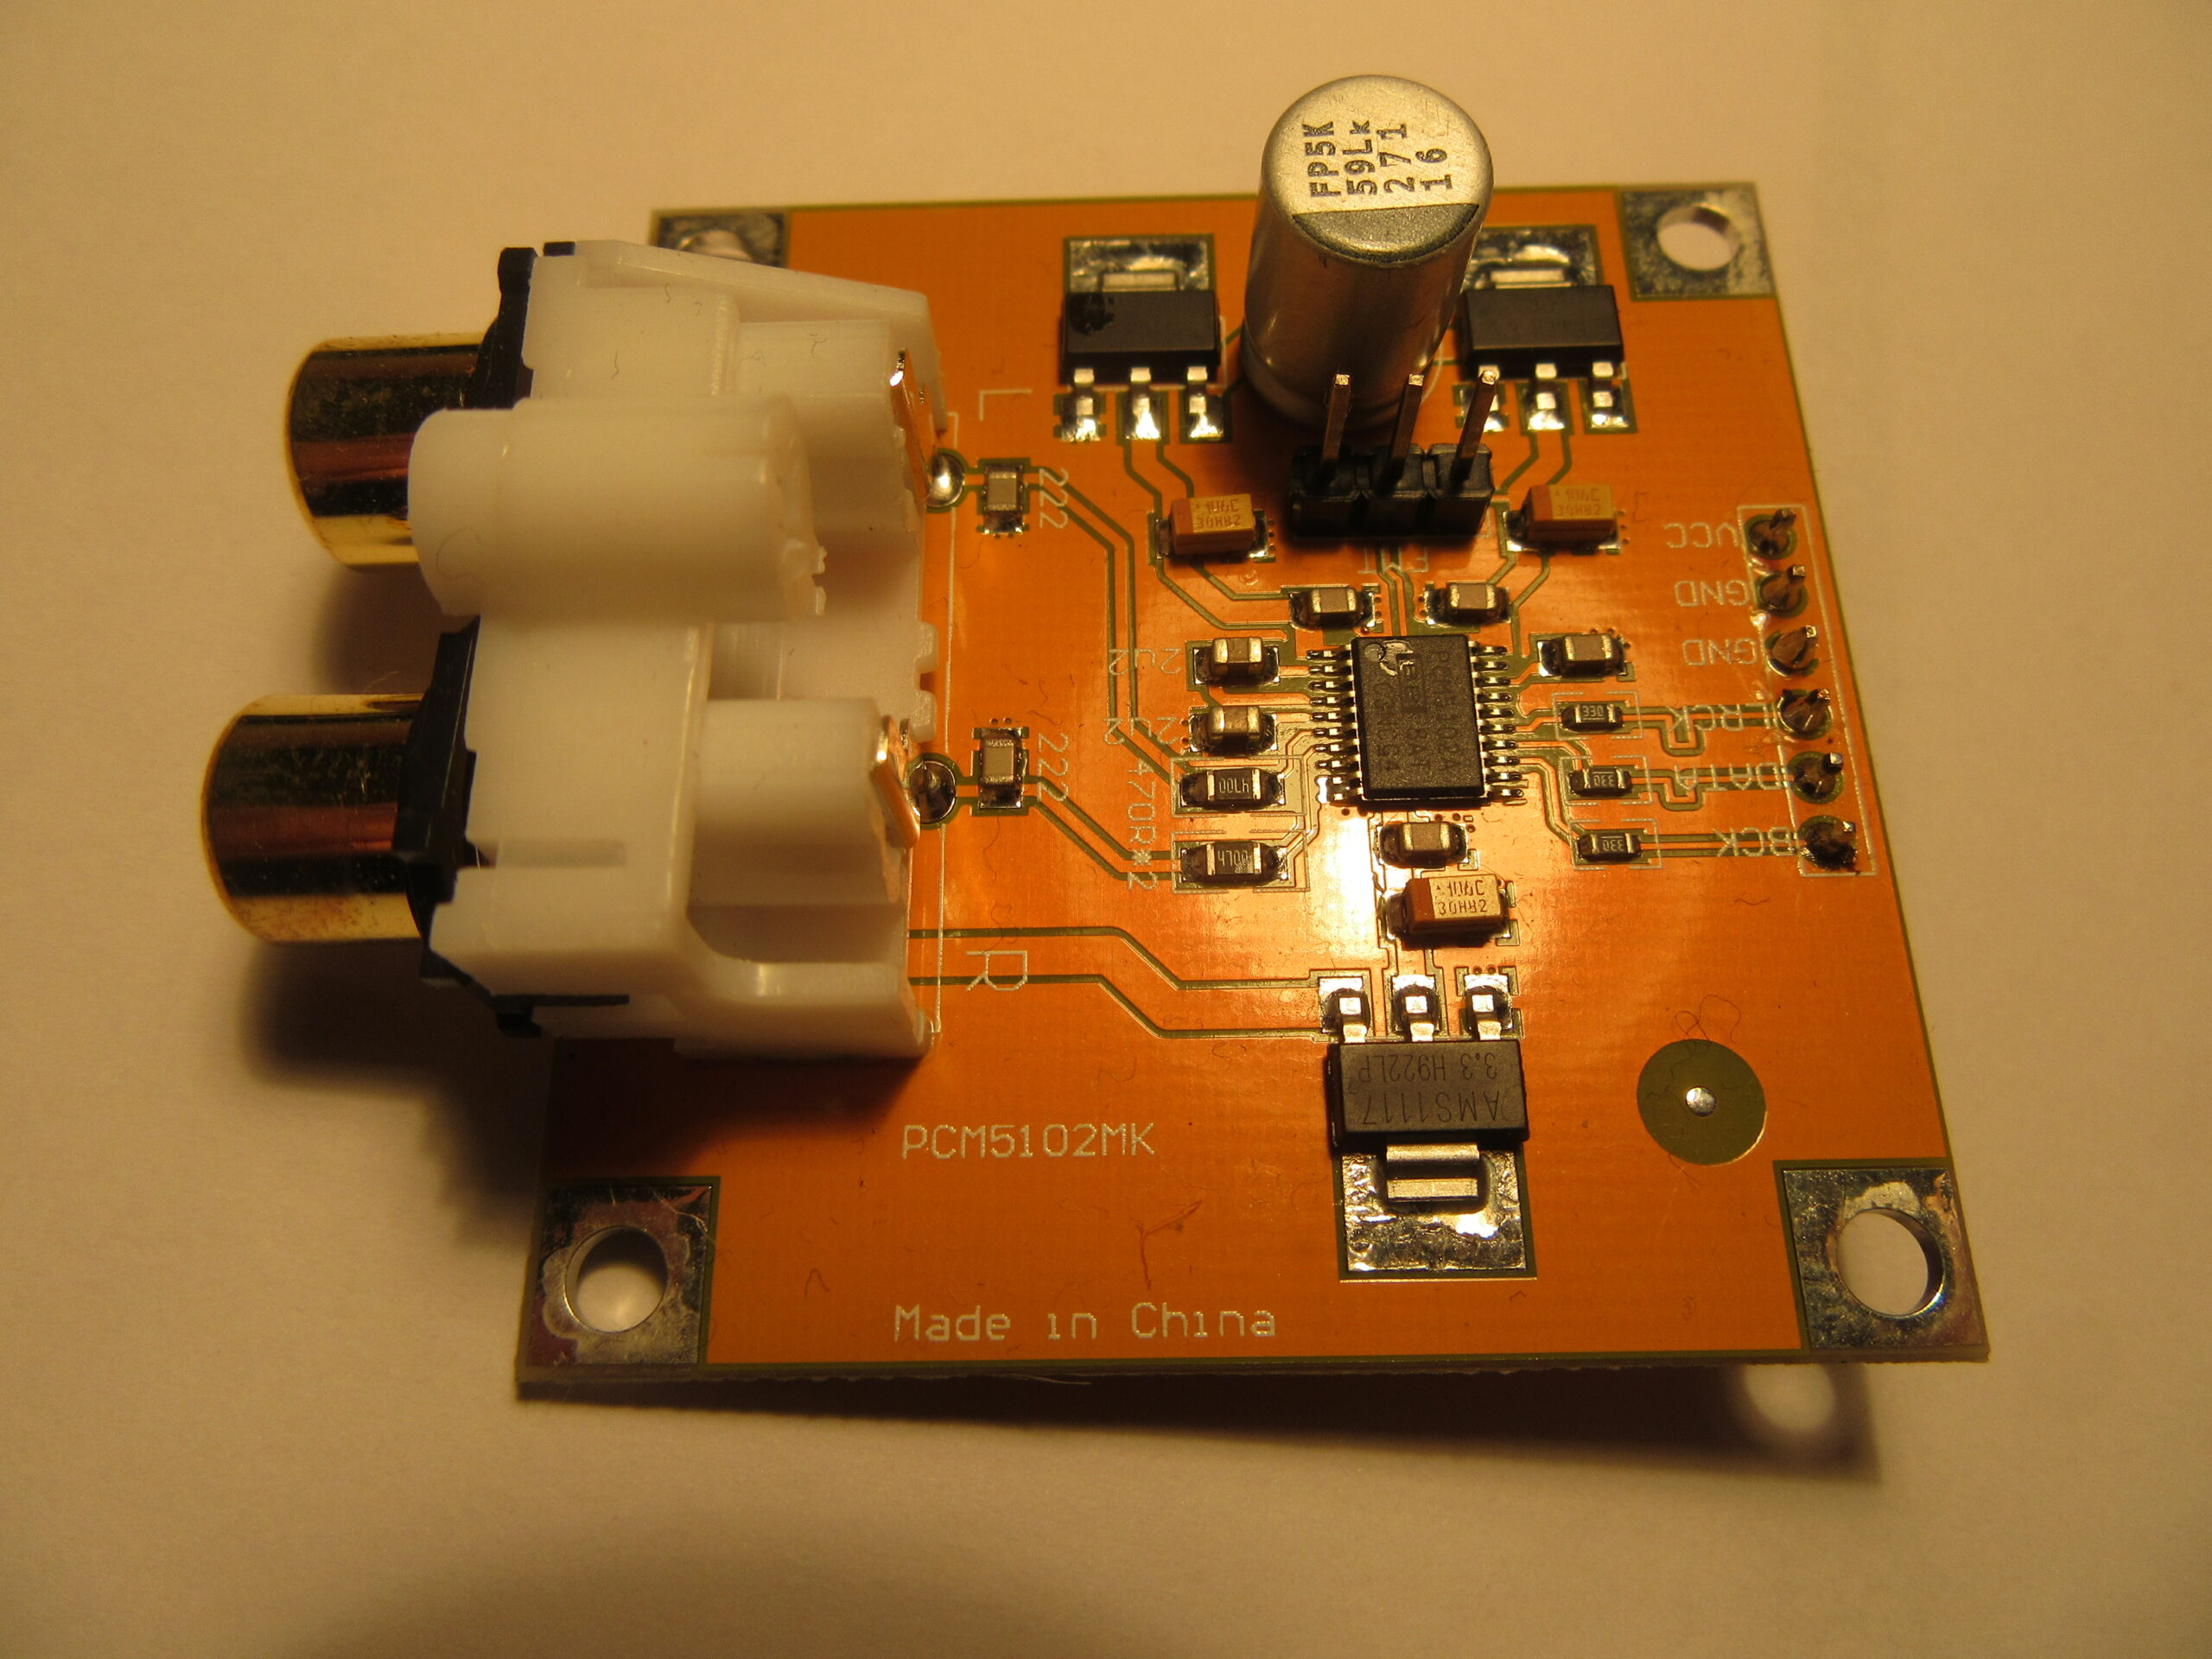
A PCM5102A from Texas Instruments with 32 bit and 112dB signal-to-noise ratio is used as a high-quality D/A converter. It’s actually way too good for Bluetooth audio, but the advantages of 32-bit pay off when it comes to volume control.

D/A-Wandler Board
D/A converter board

The whole is complemented by two buttons for volume and reset, a 128×64 pixel OLED display and a breadboard. For this project, I use ready-made modules that only need to be connected to each other. This is of course much faster than drafting your own circuit board.
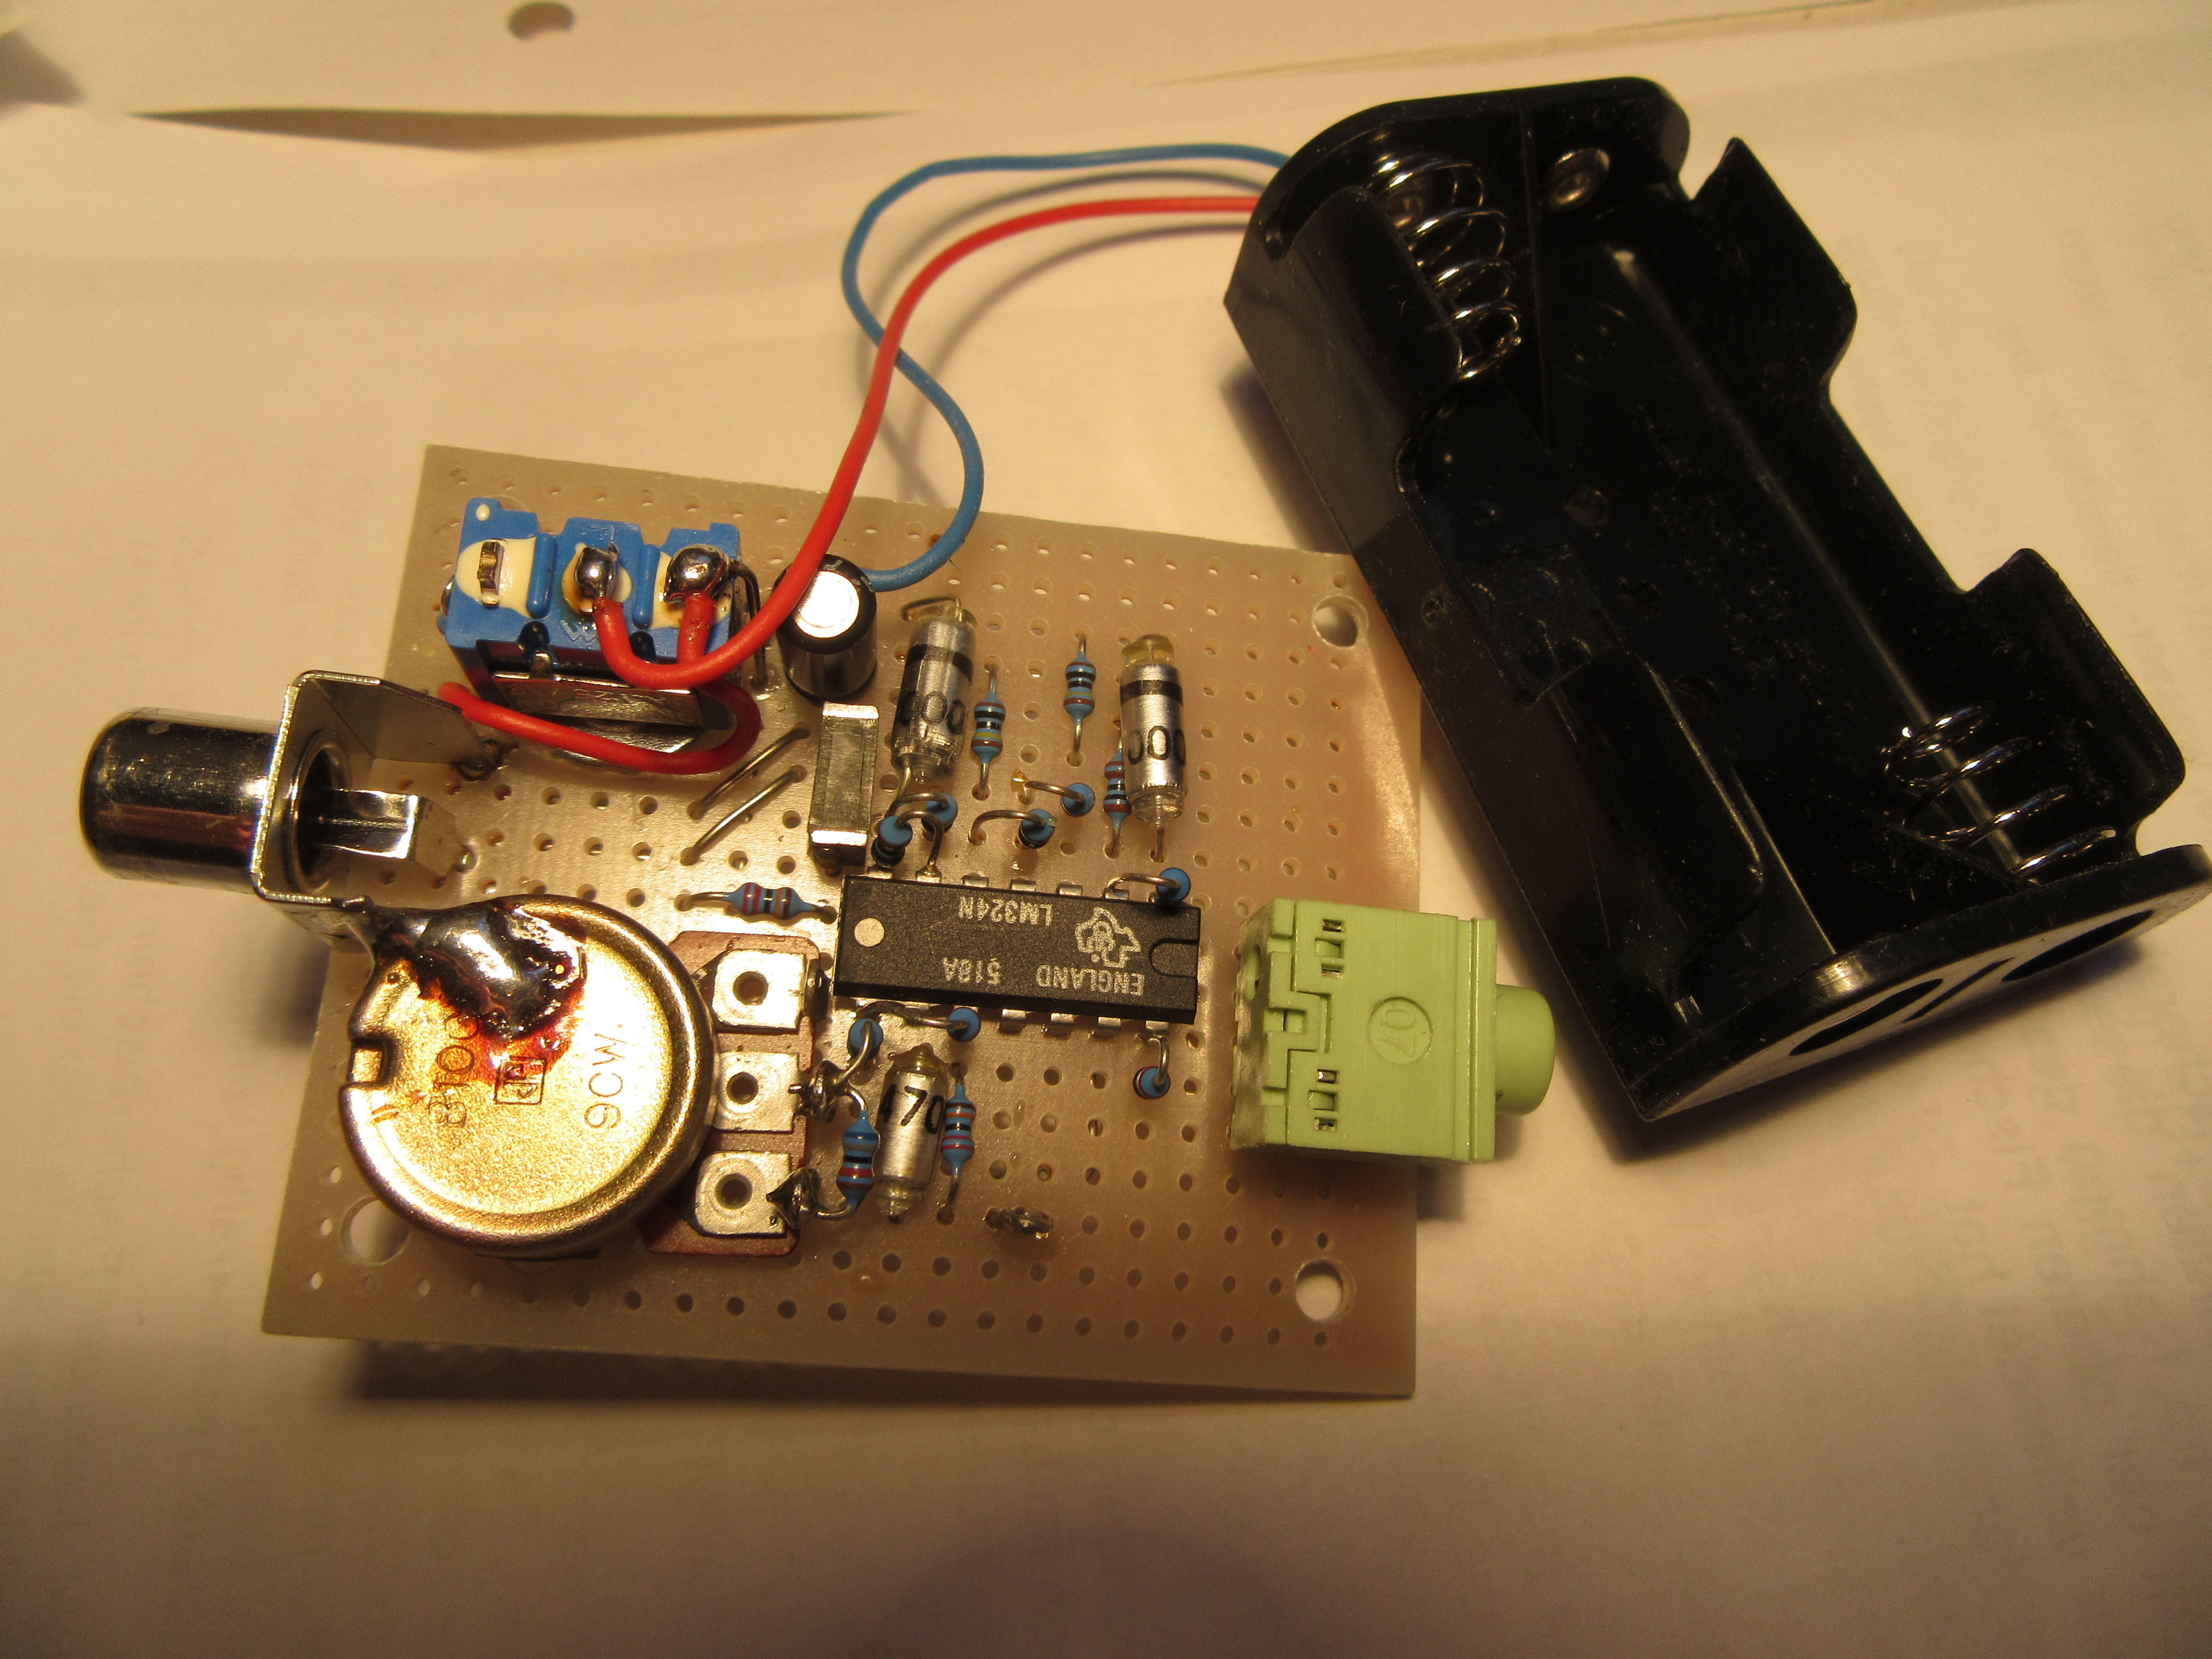
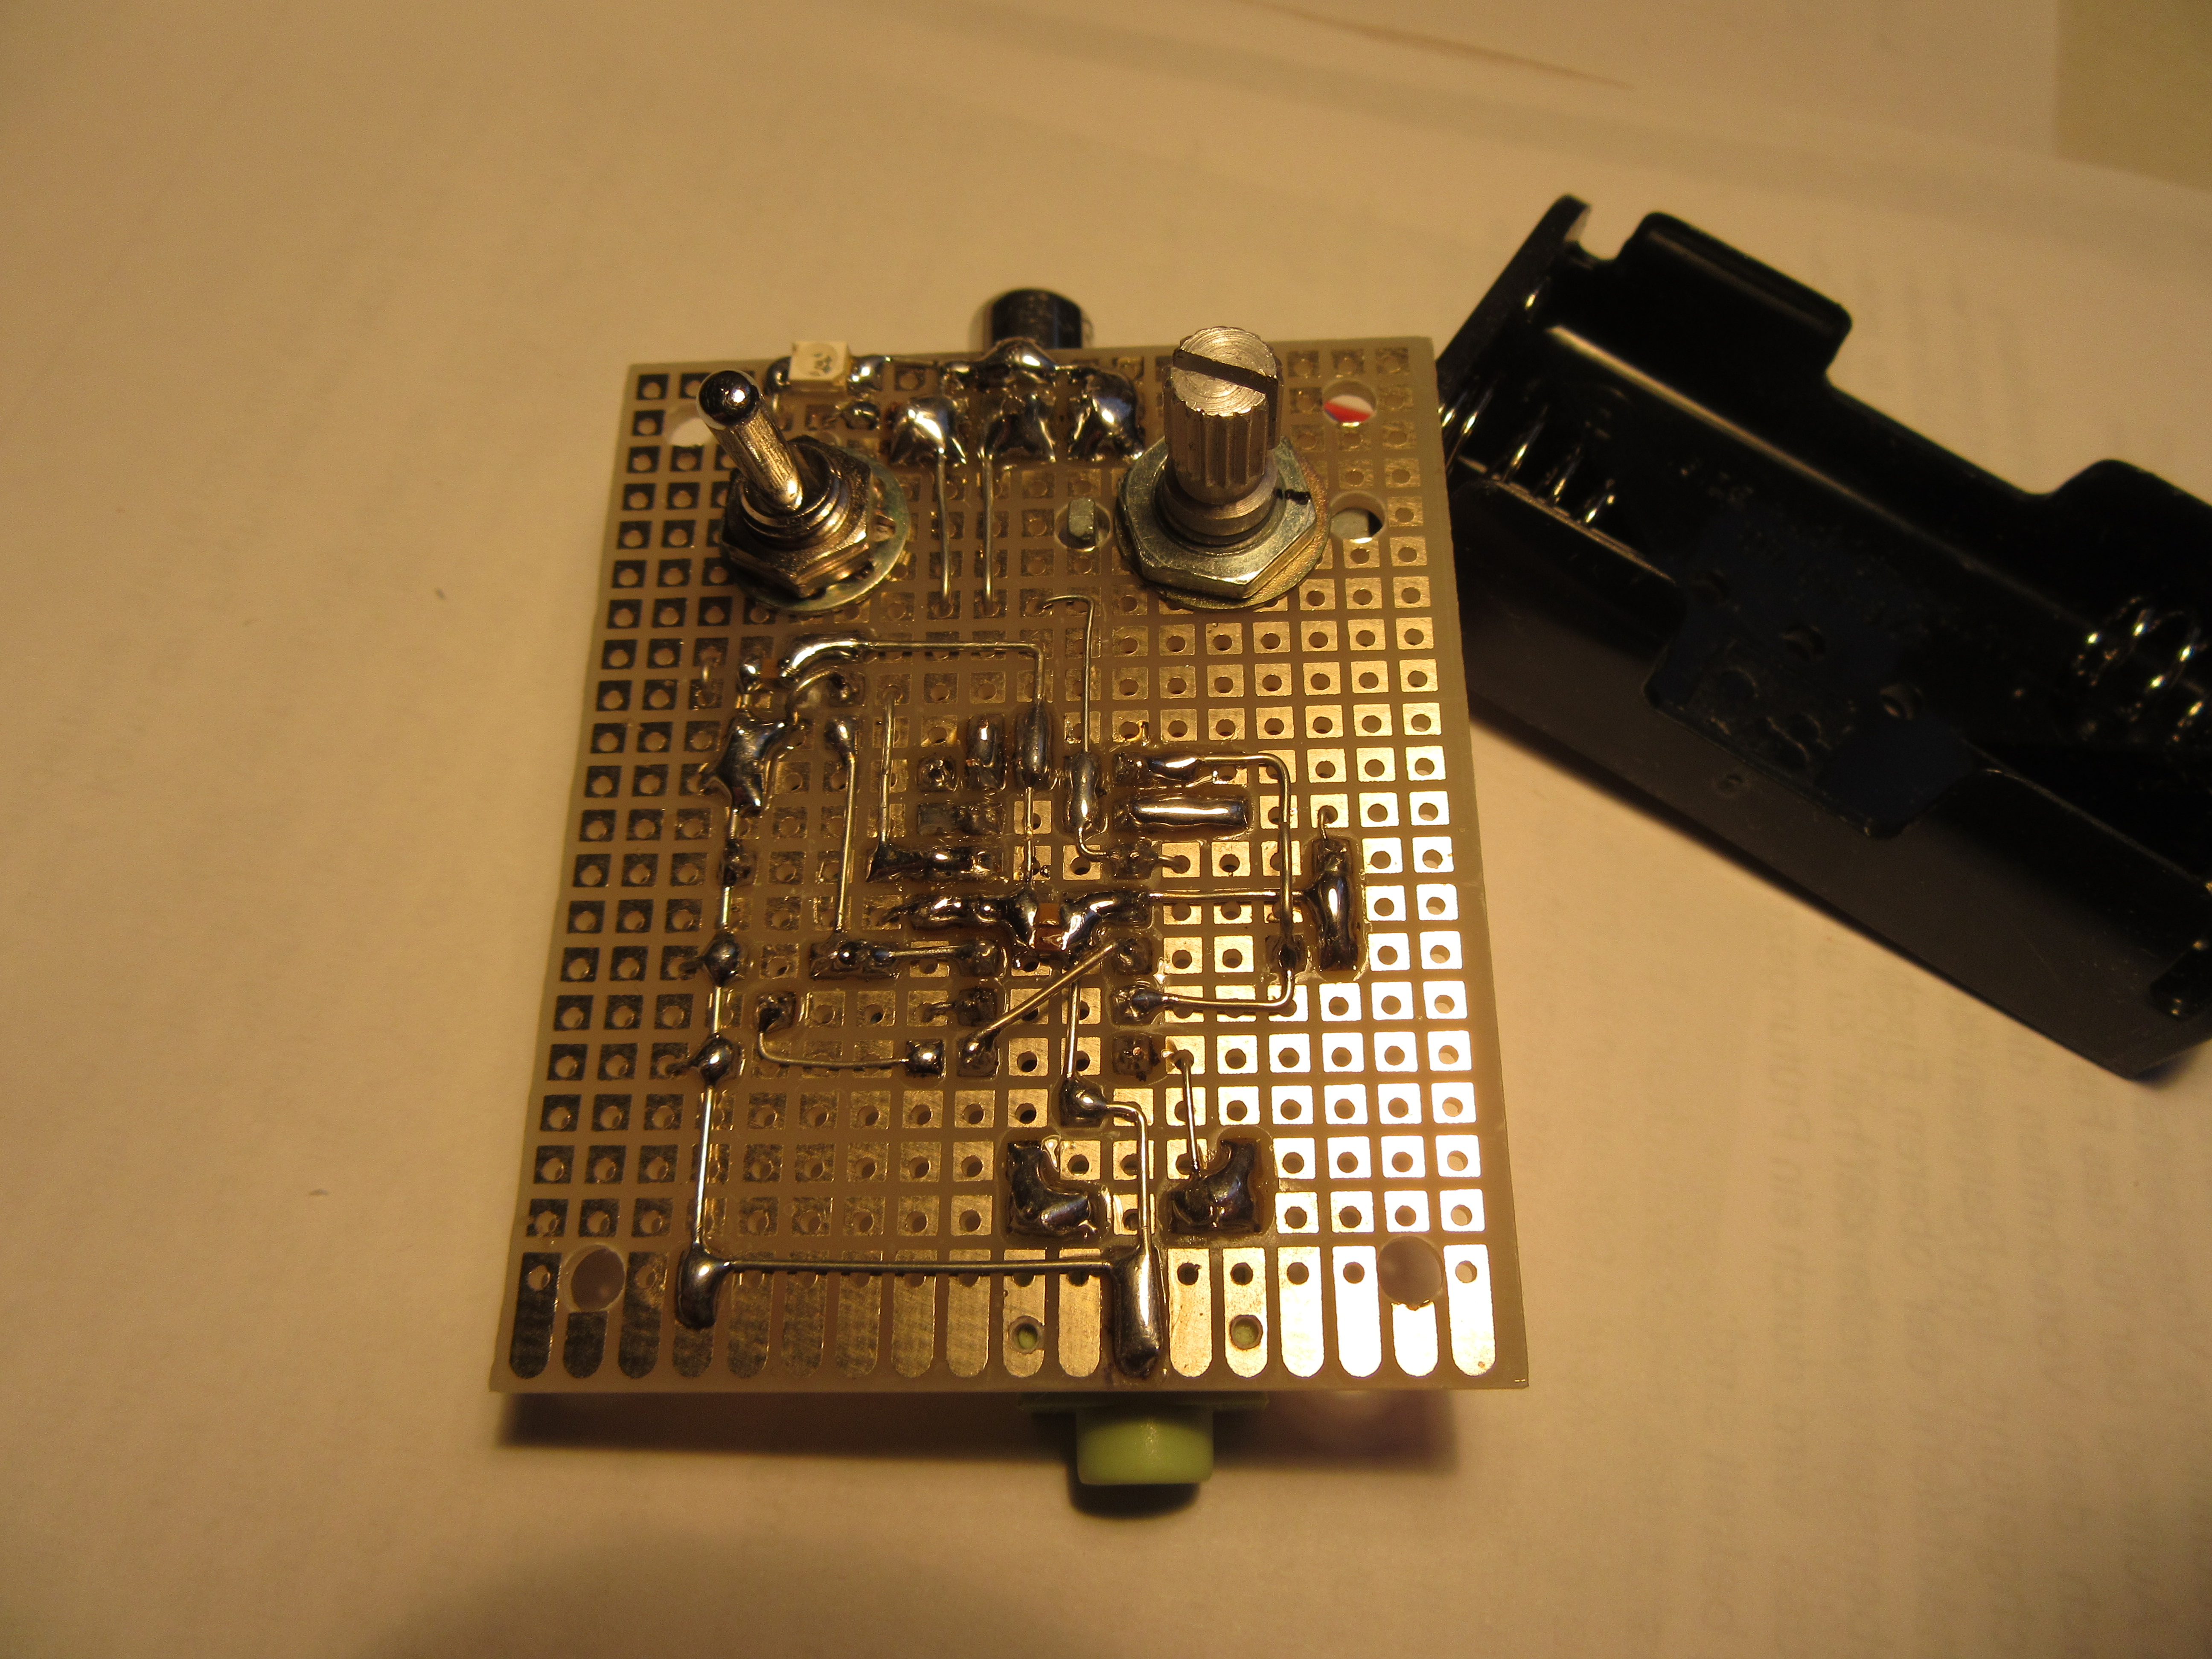
Bauteile
components

Circuit

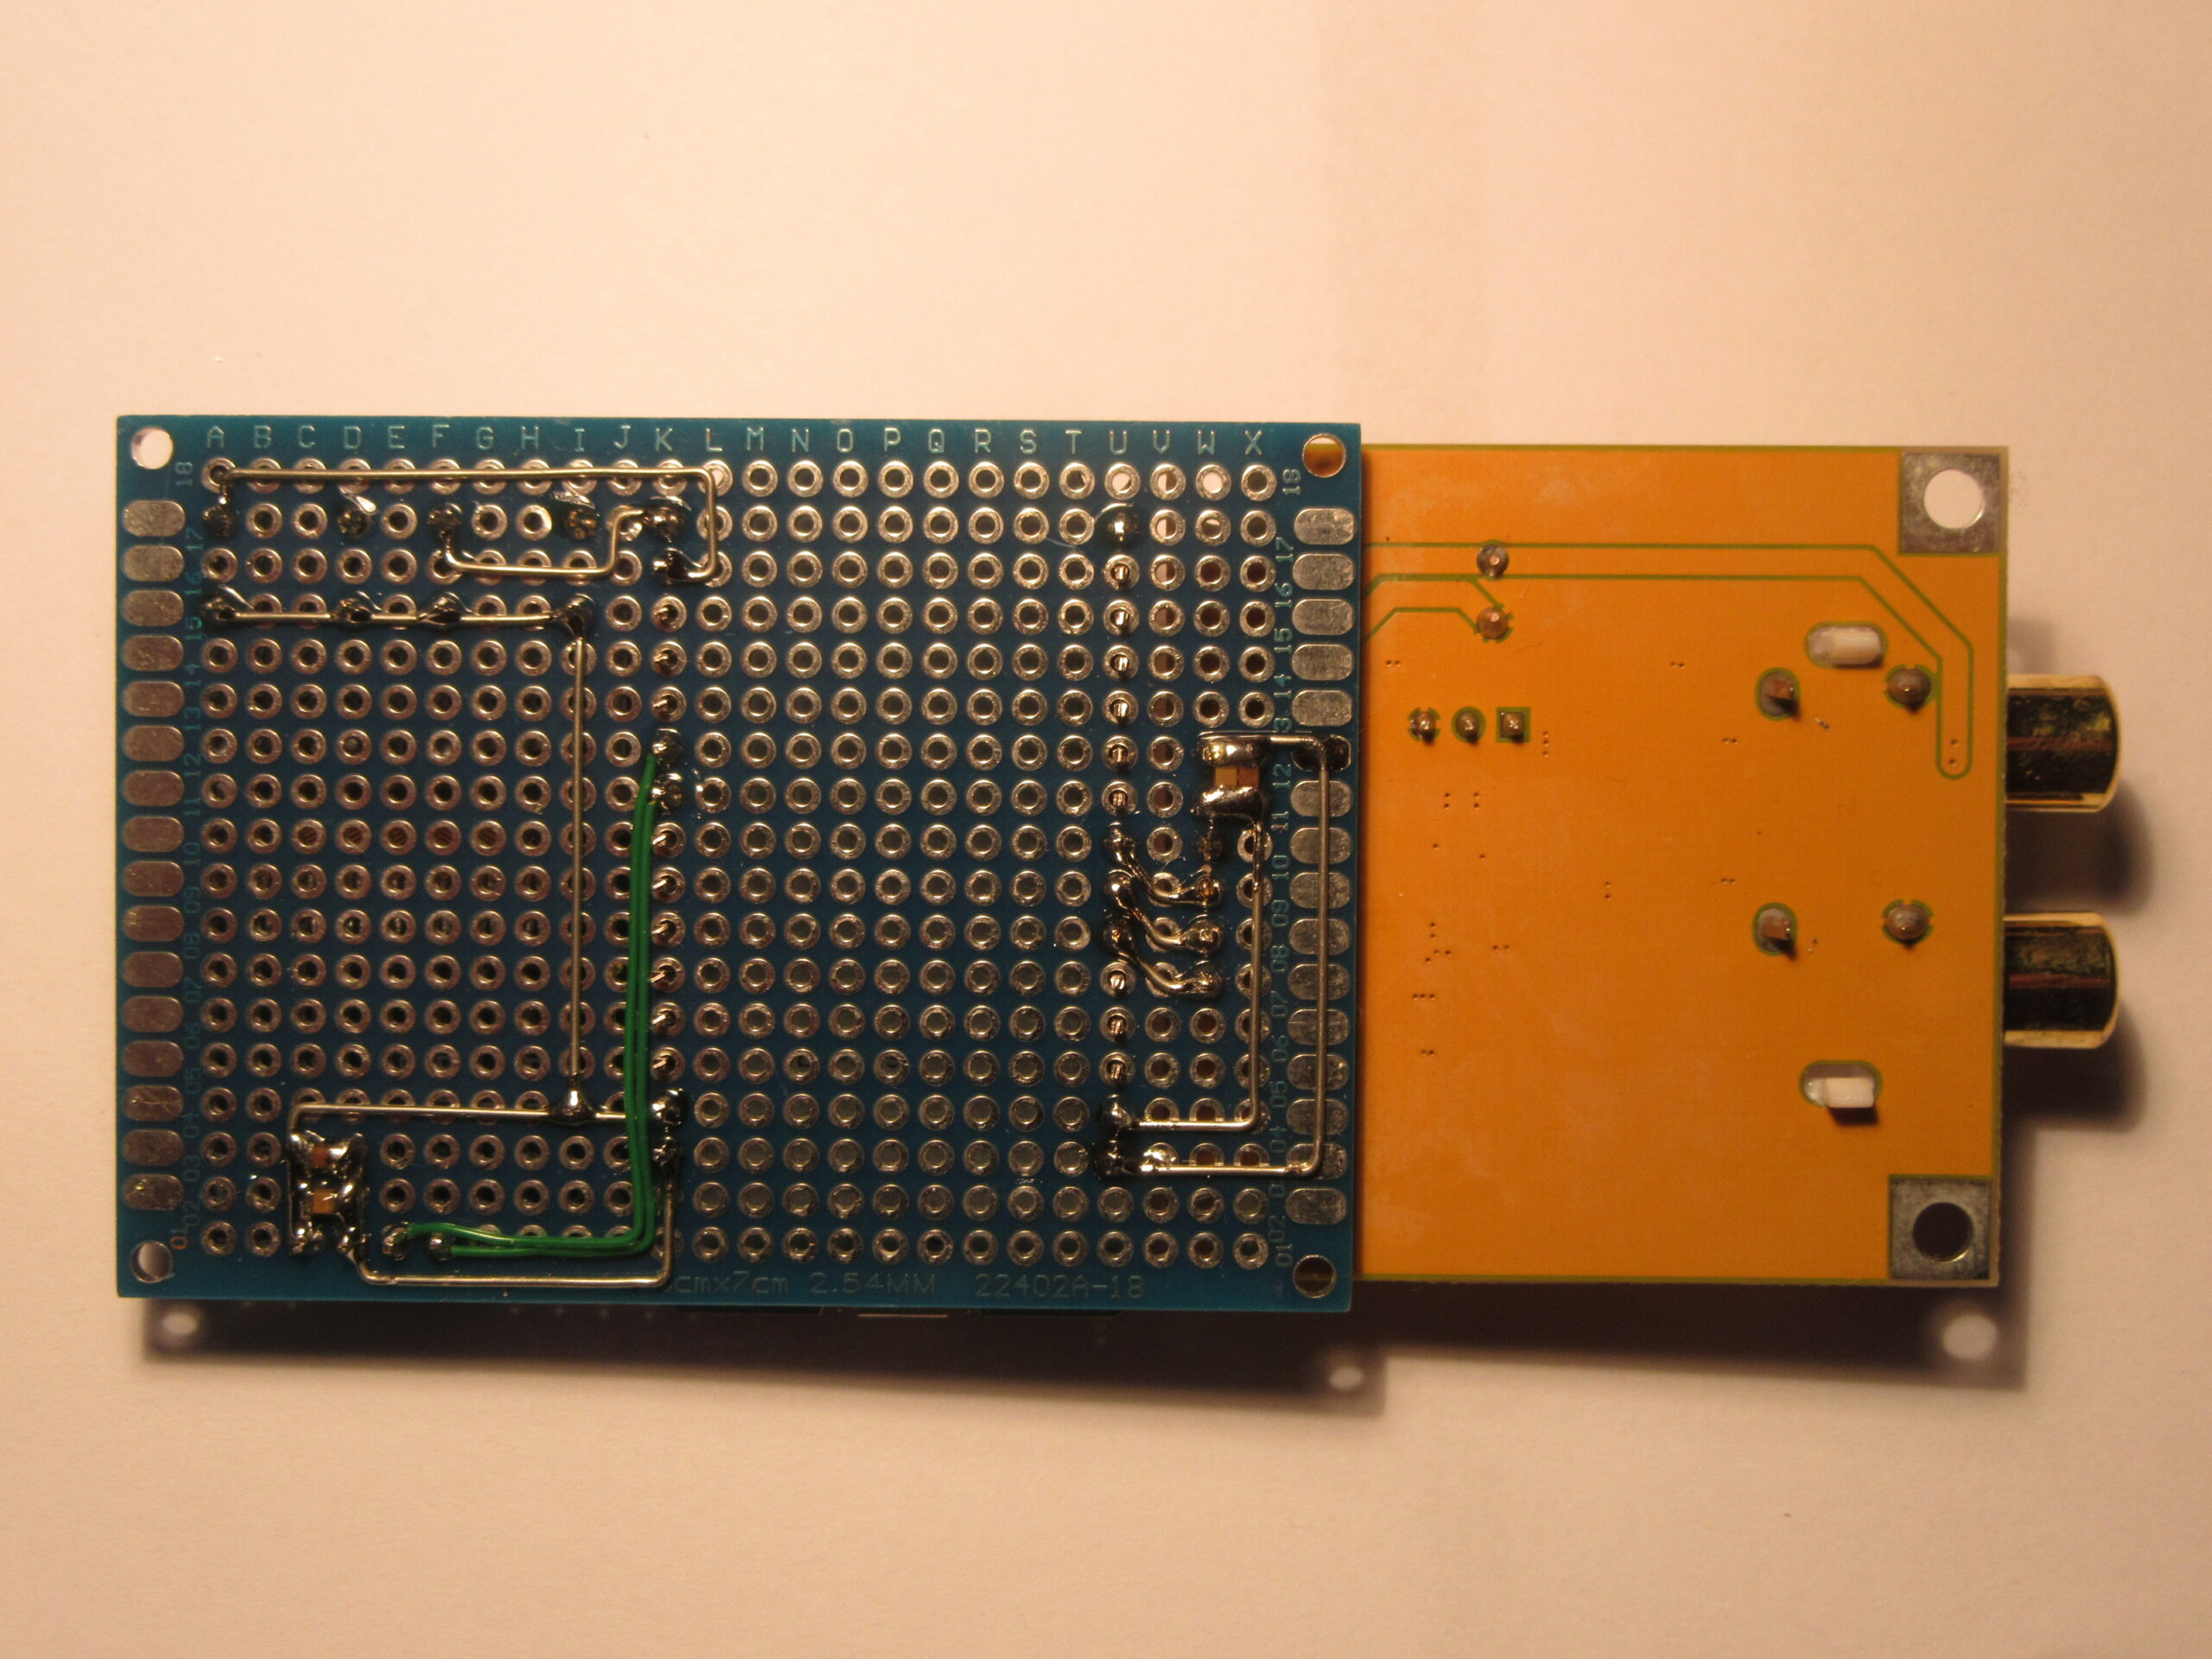
Since I used finished modules for the project, the circuit is limited to a few connections between the central ESP32 module and the OLED display, the D/A converter and the two buttons. The whole thing is soldered together in an hour.

Verdrahtung Unterseite
wiring bottom
Schaltbild
schematics

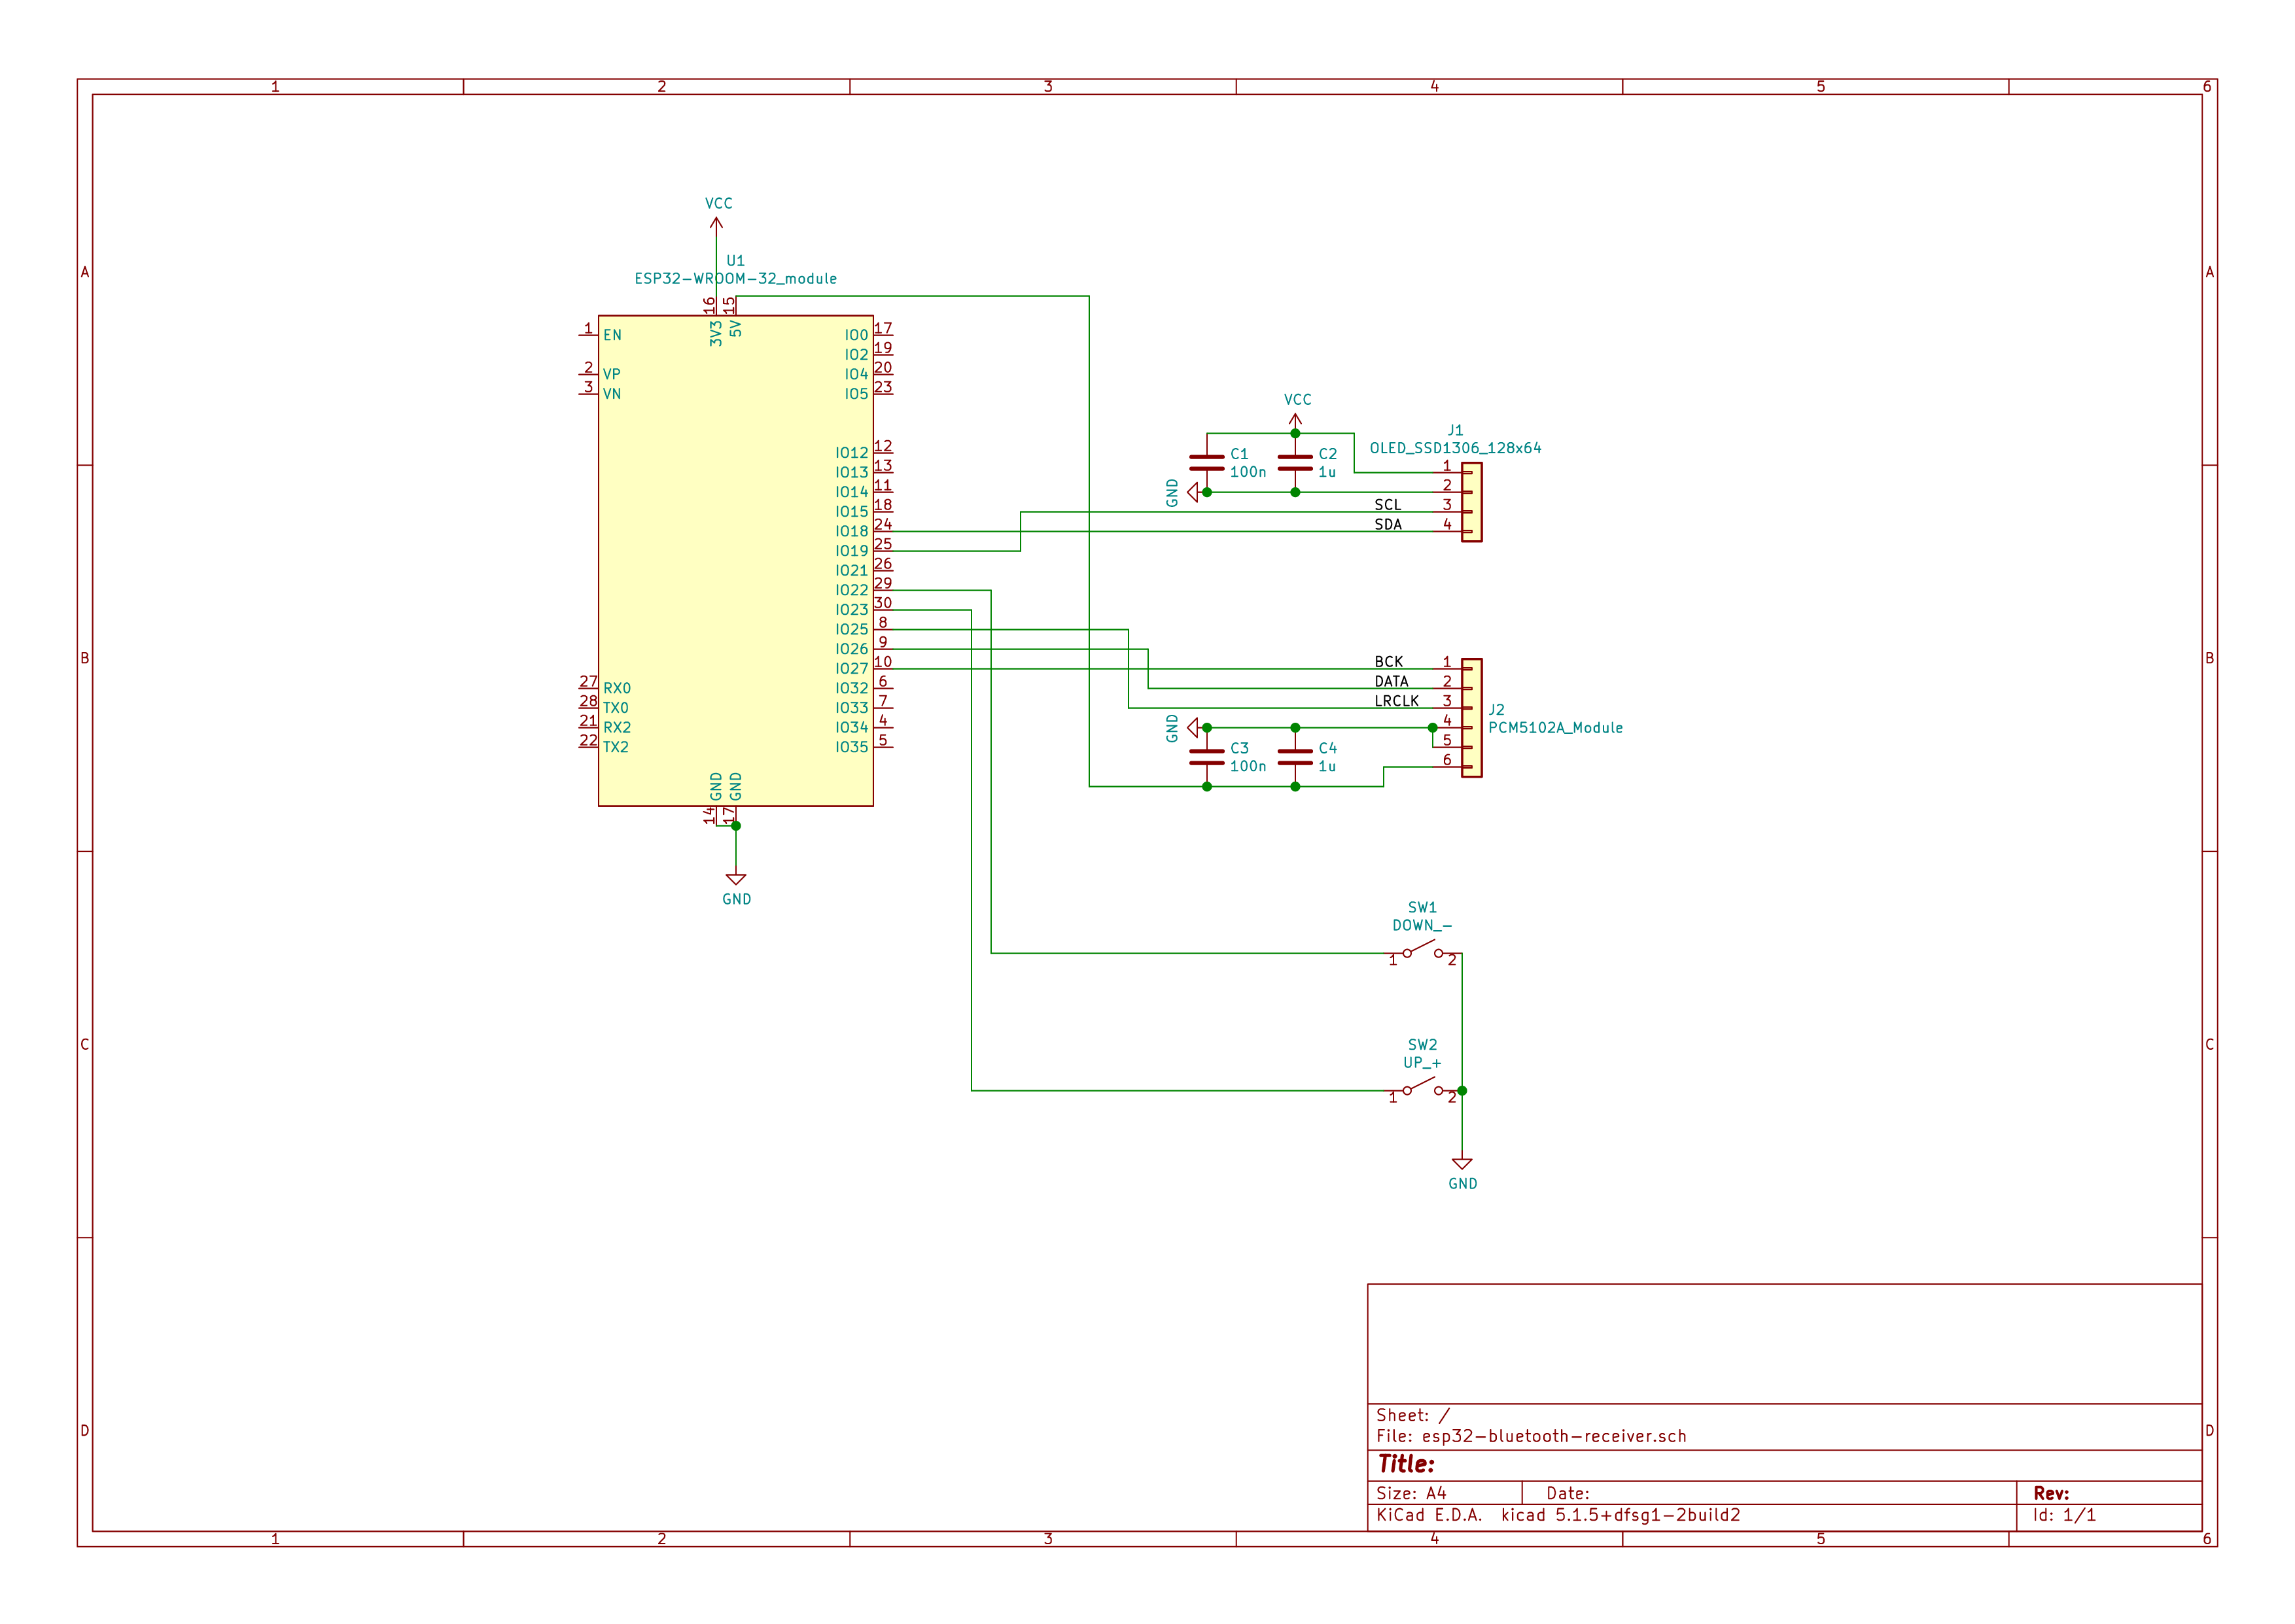
The circuit diagram is available here as a pdf.
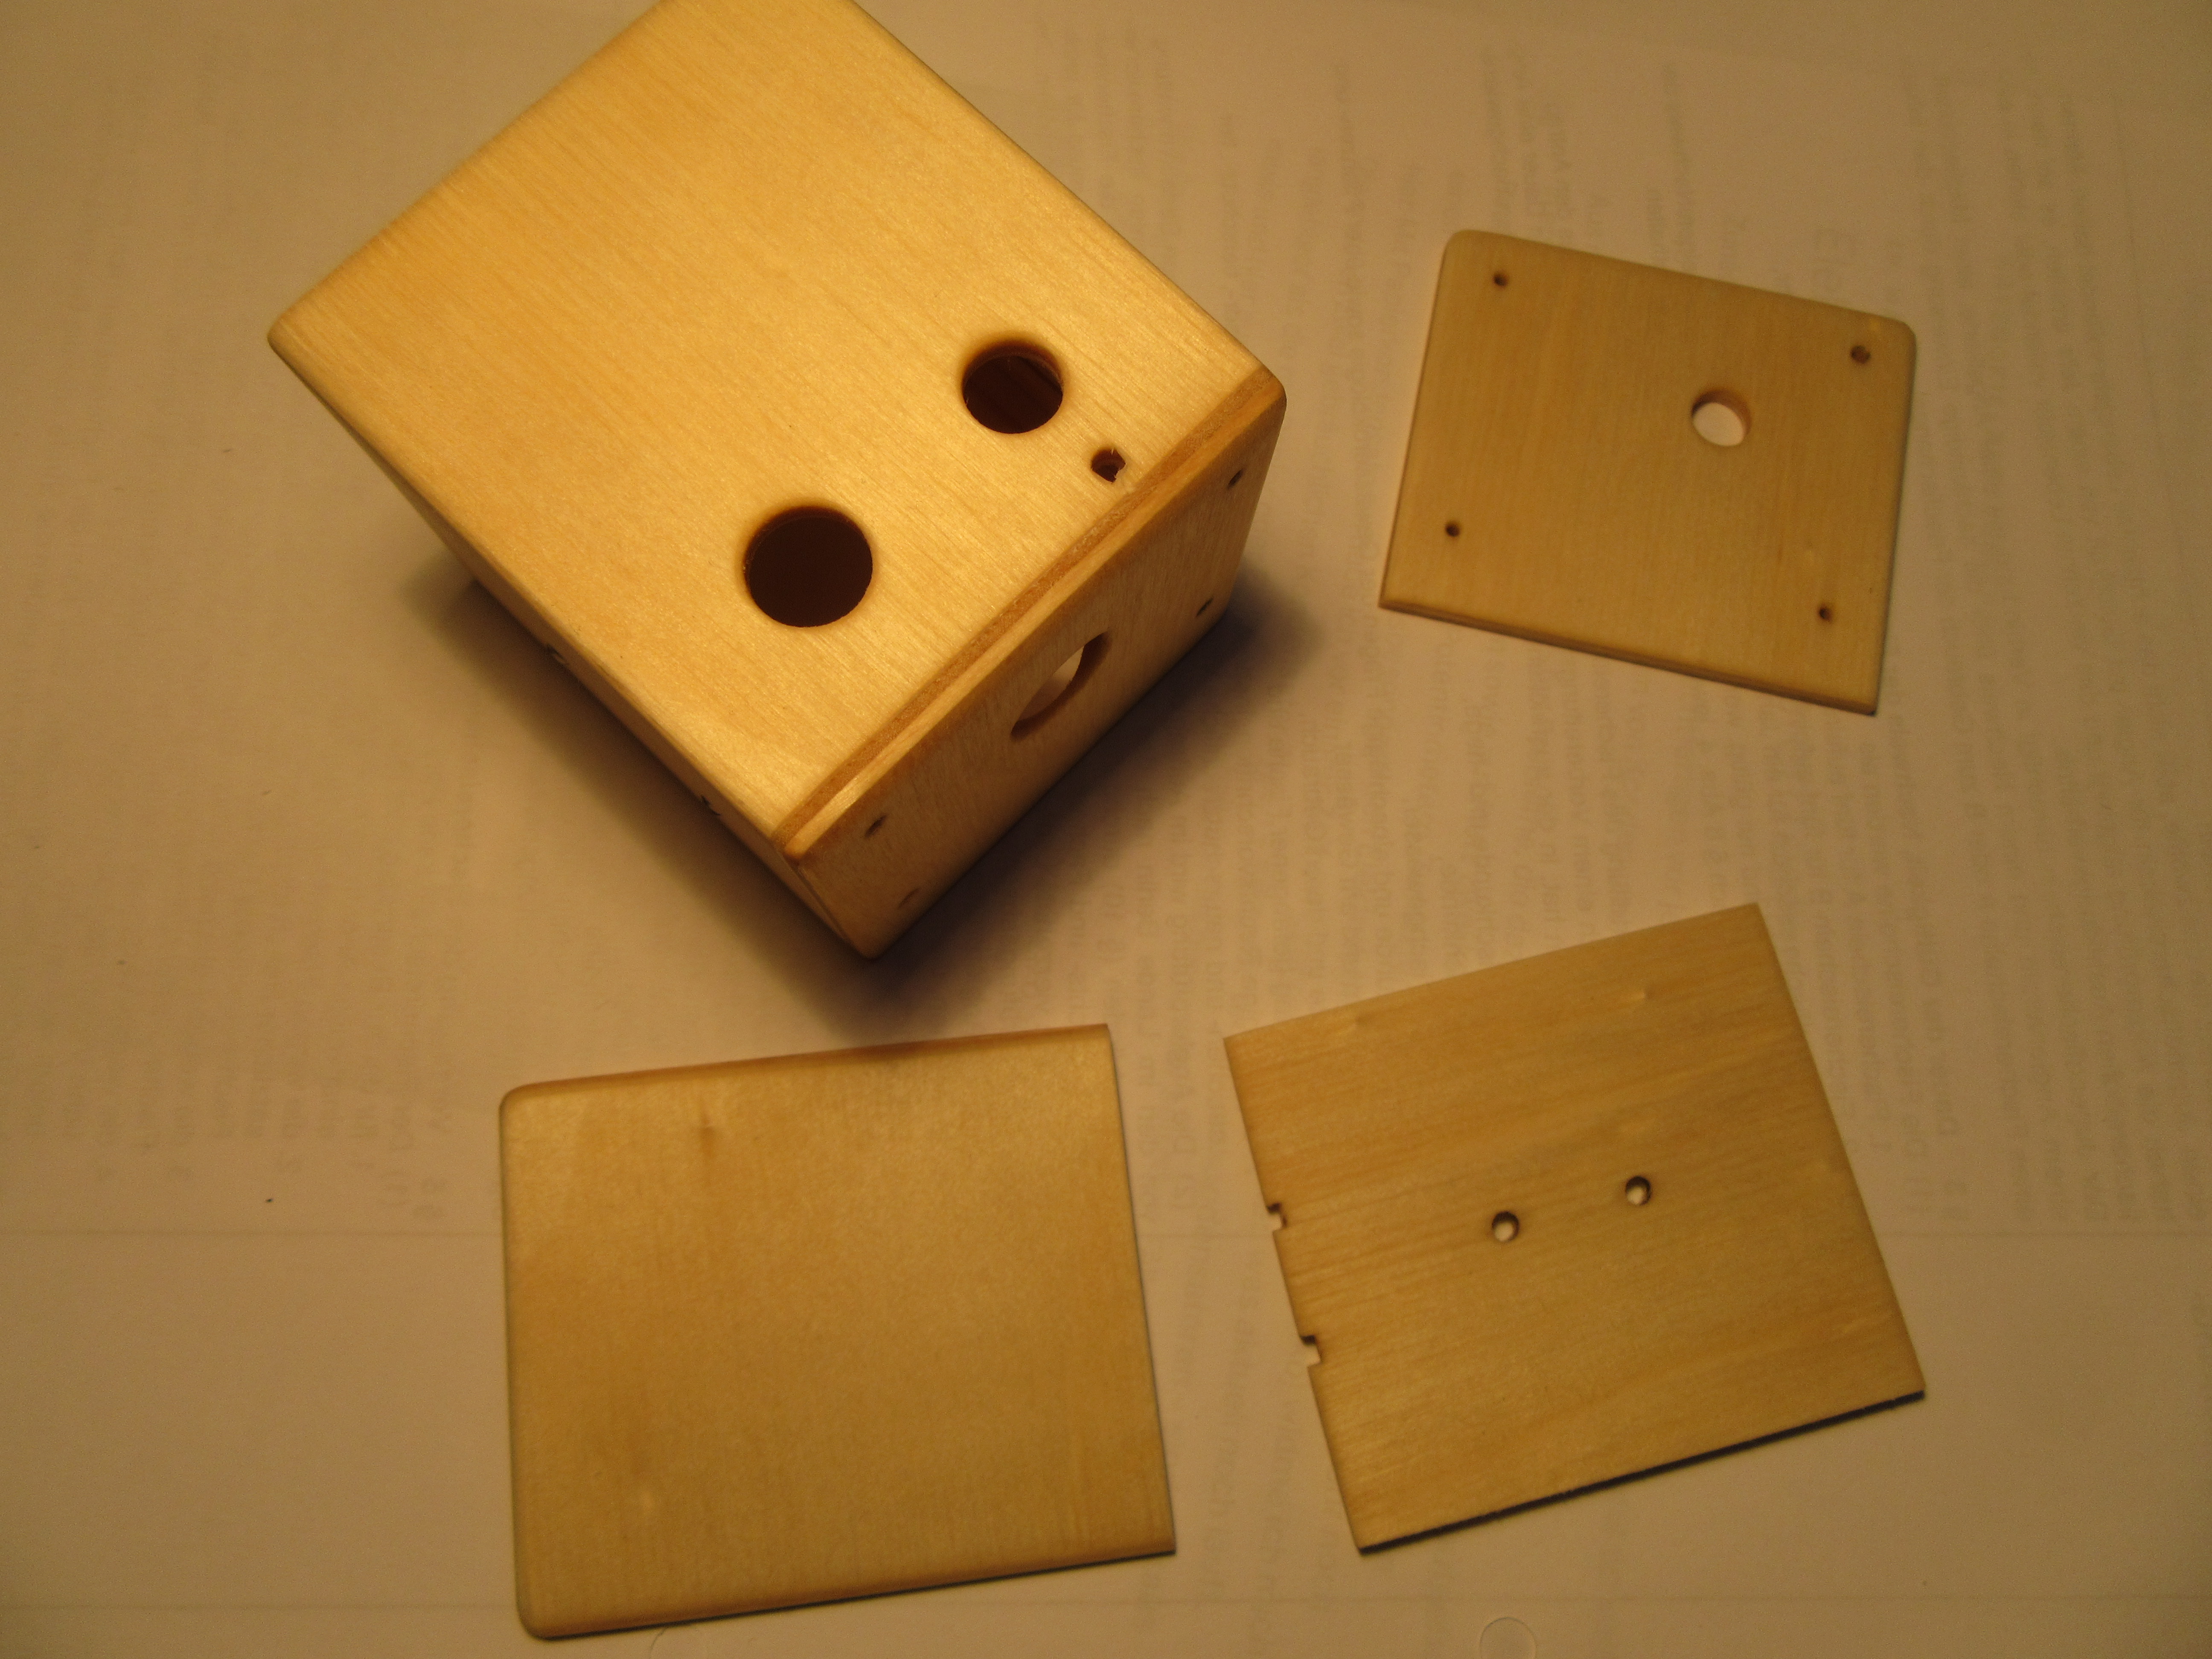
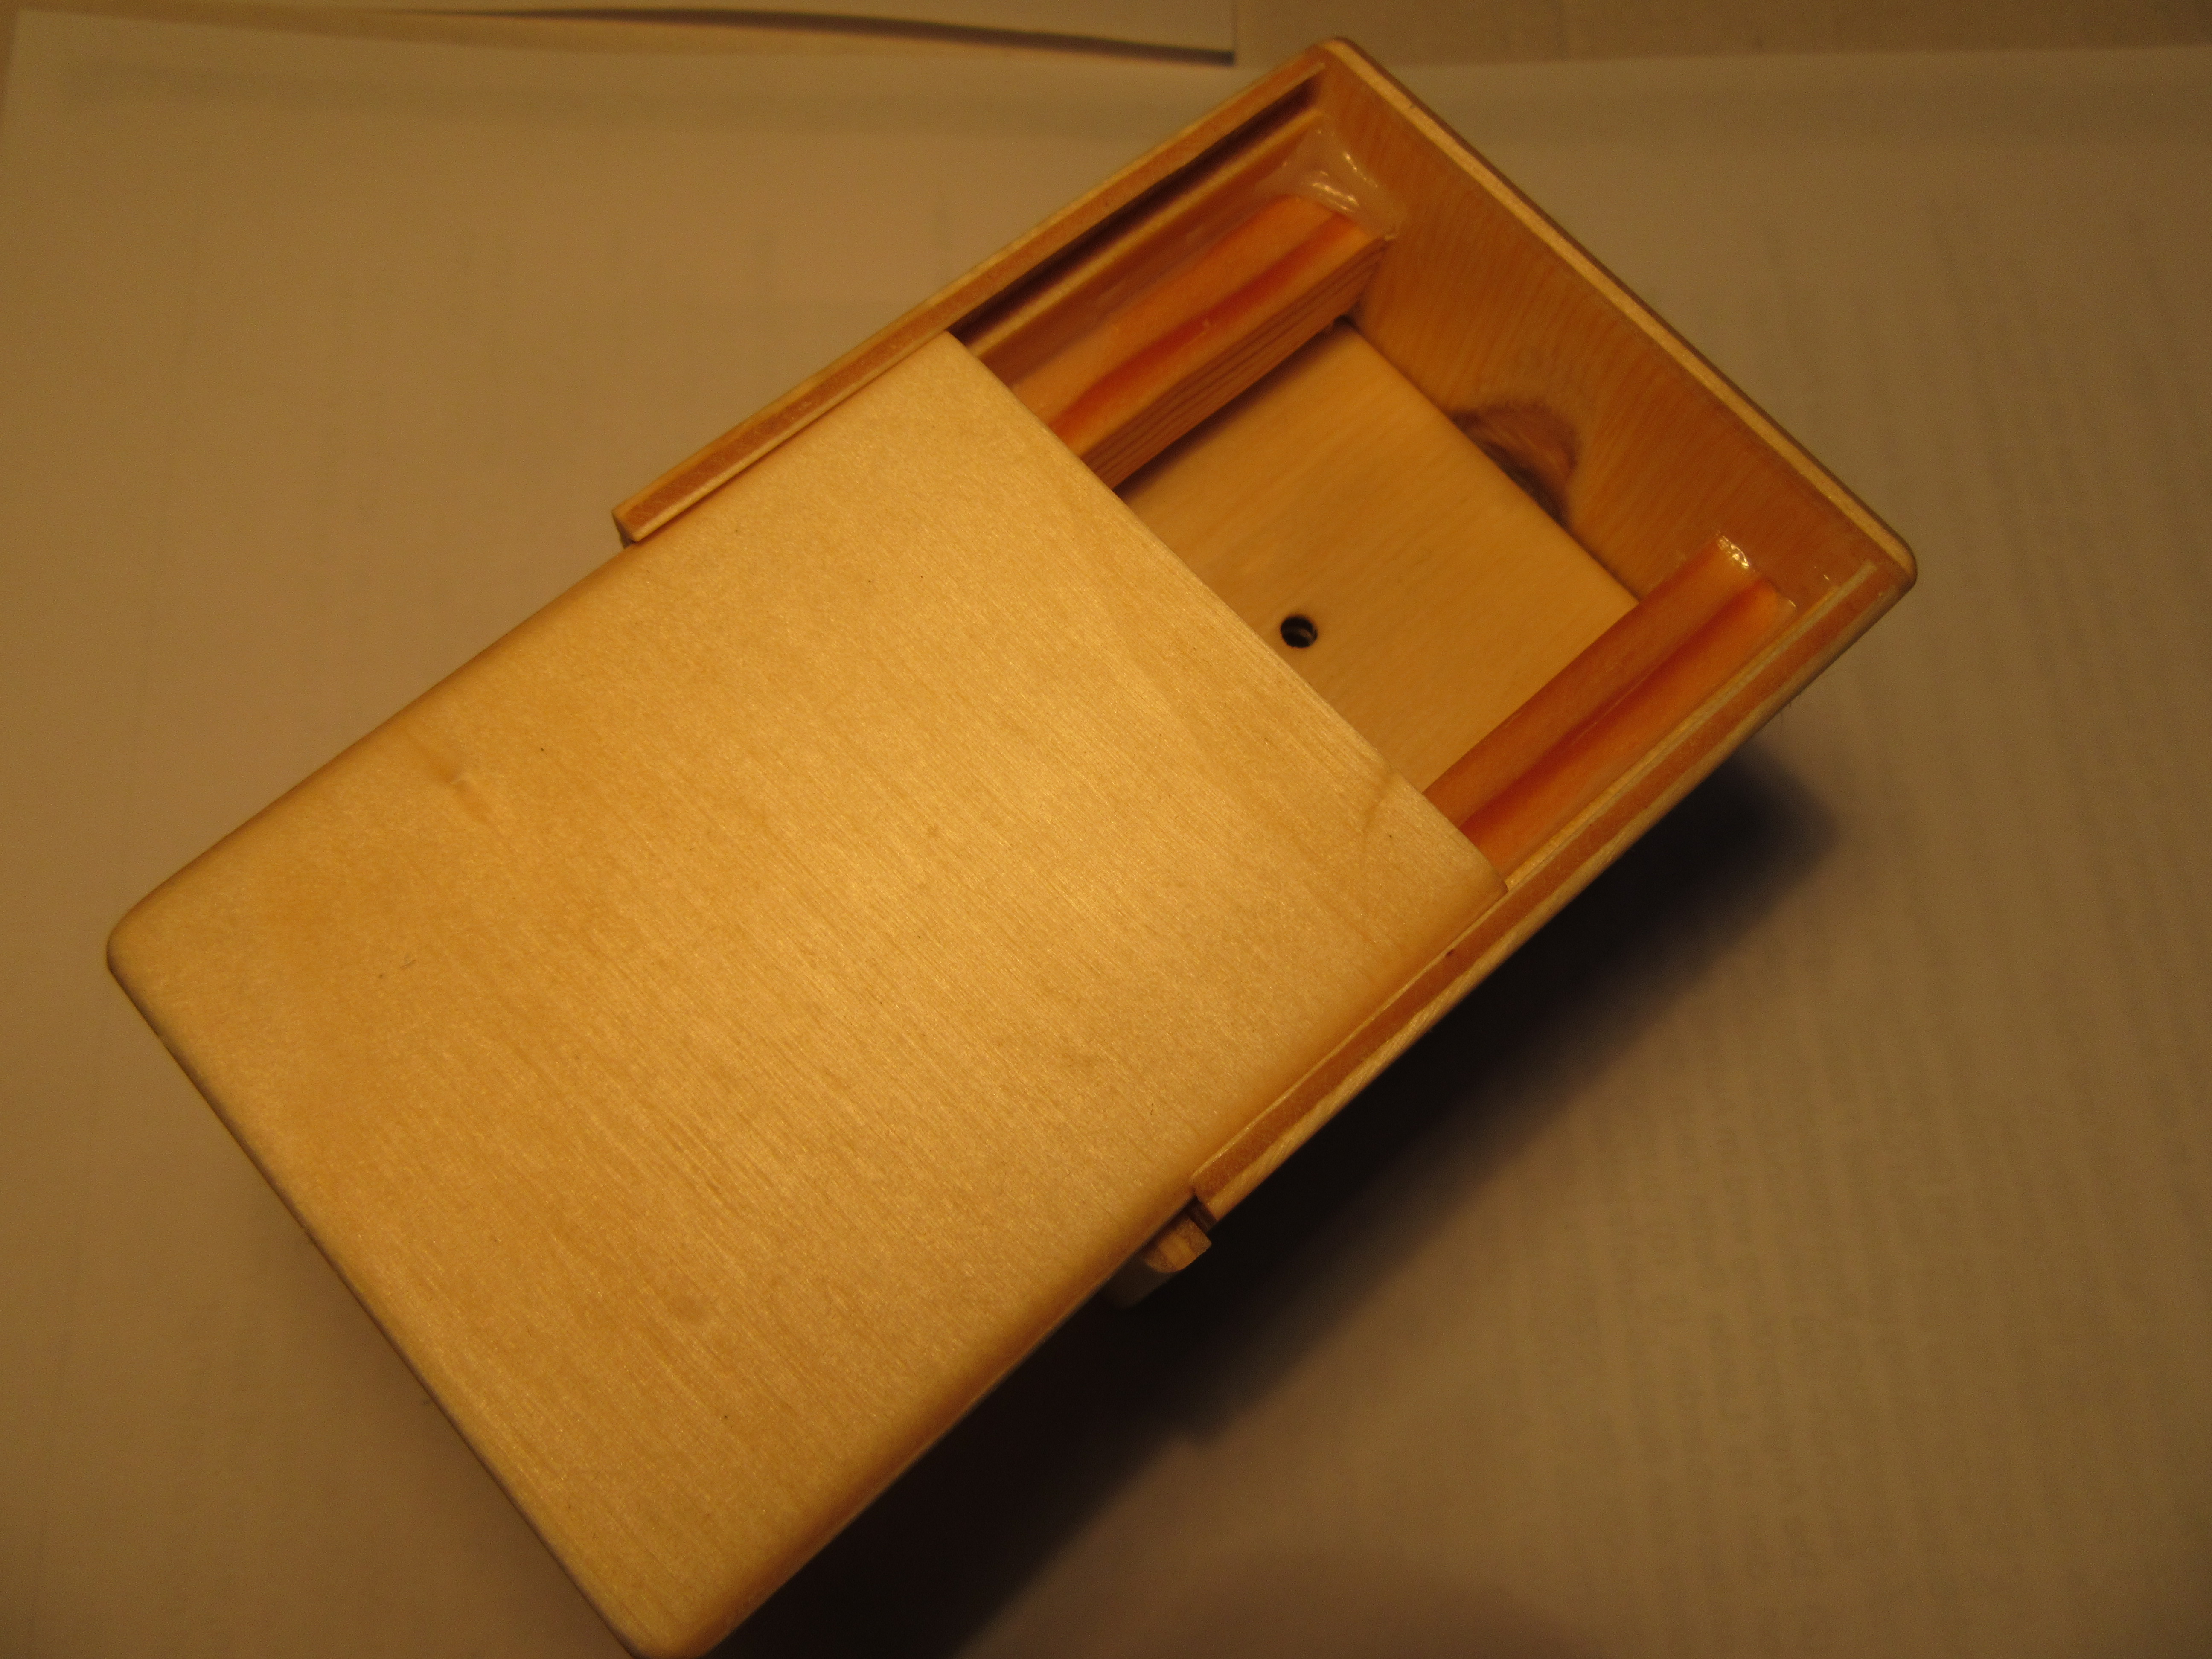
Prototyp
prototype
Funktionstest
function test

Case

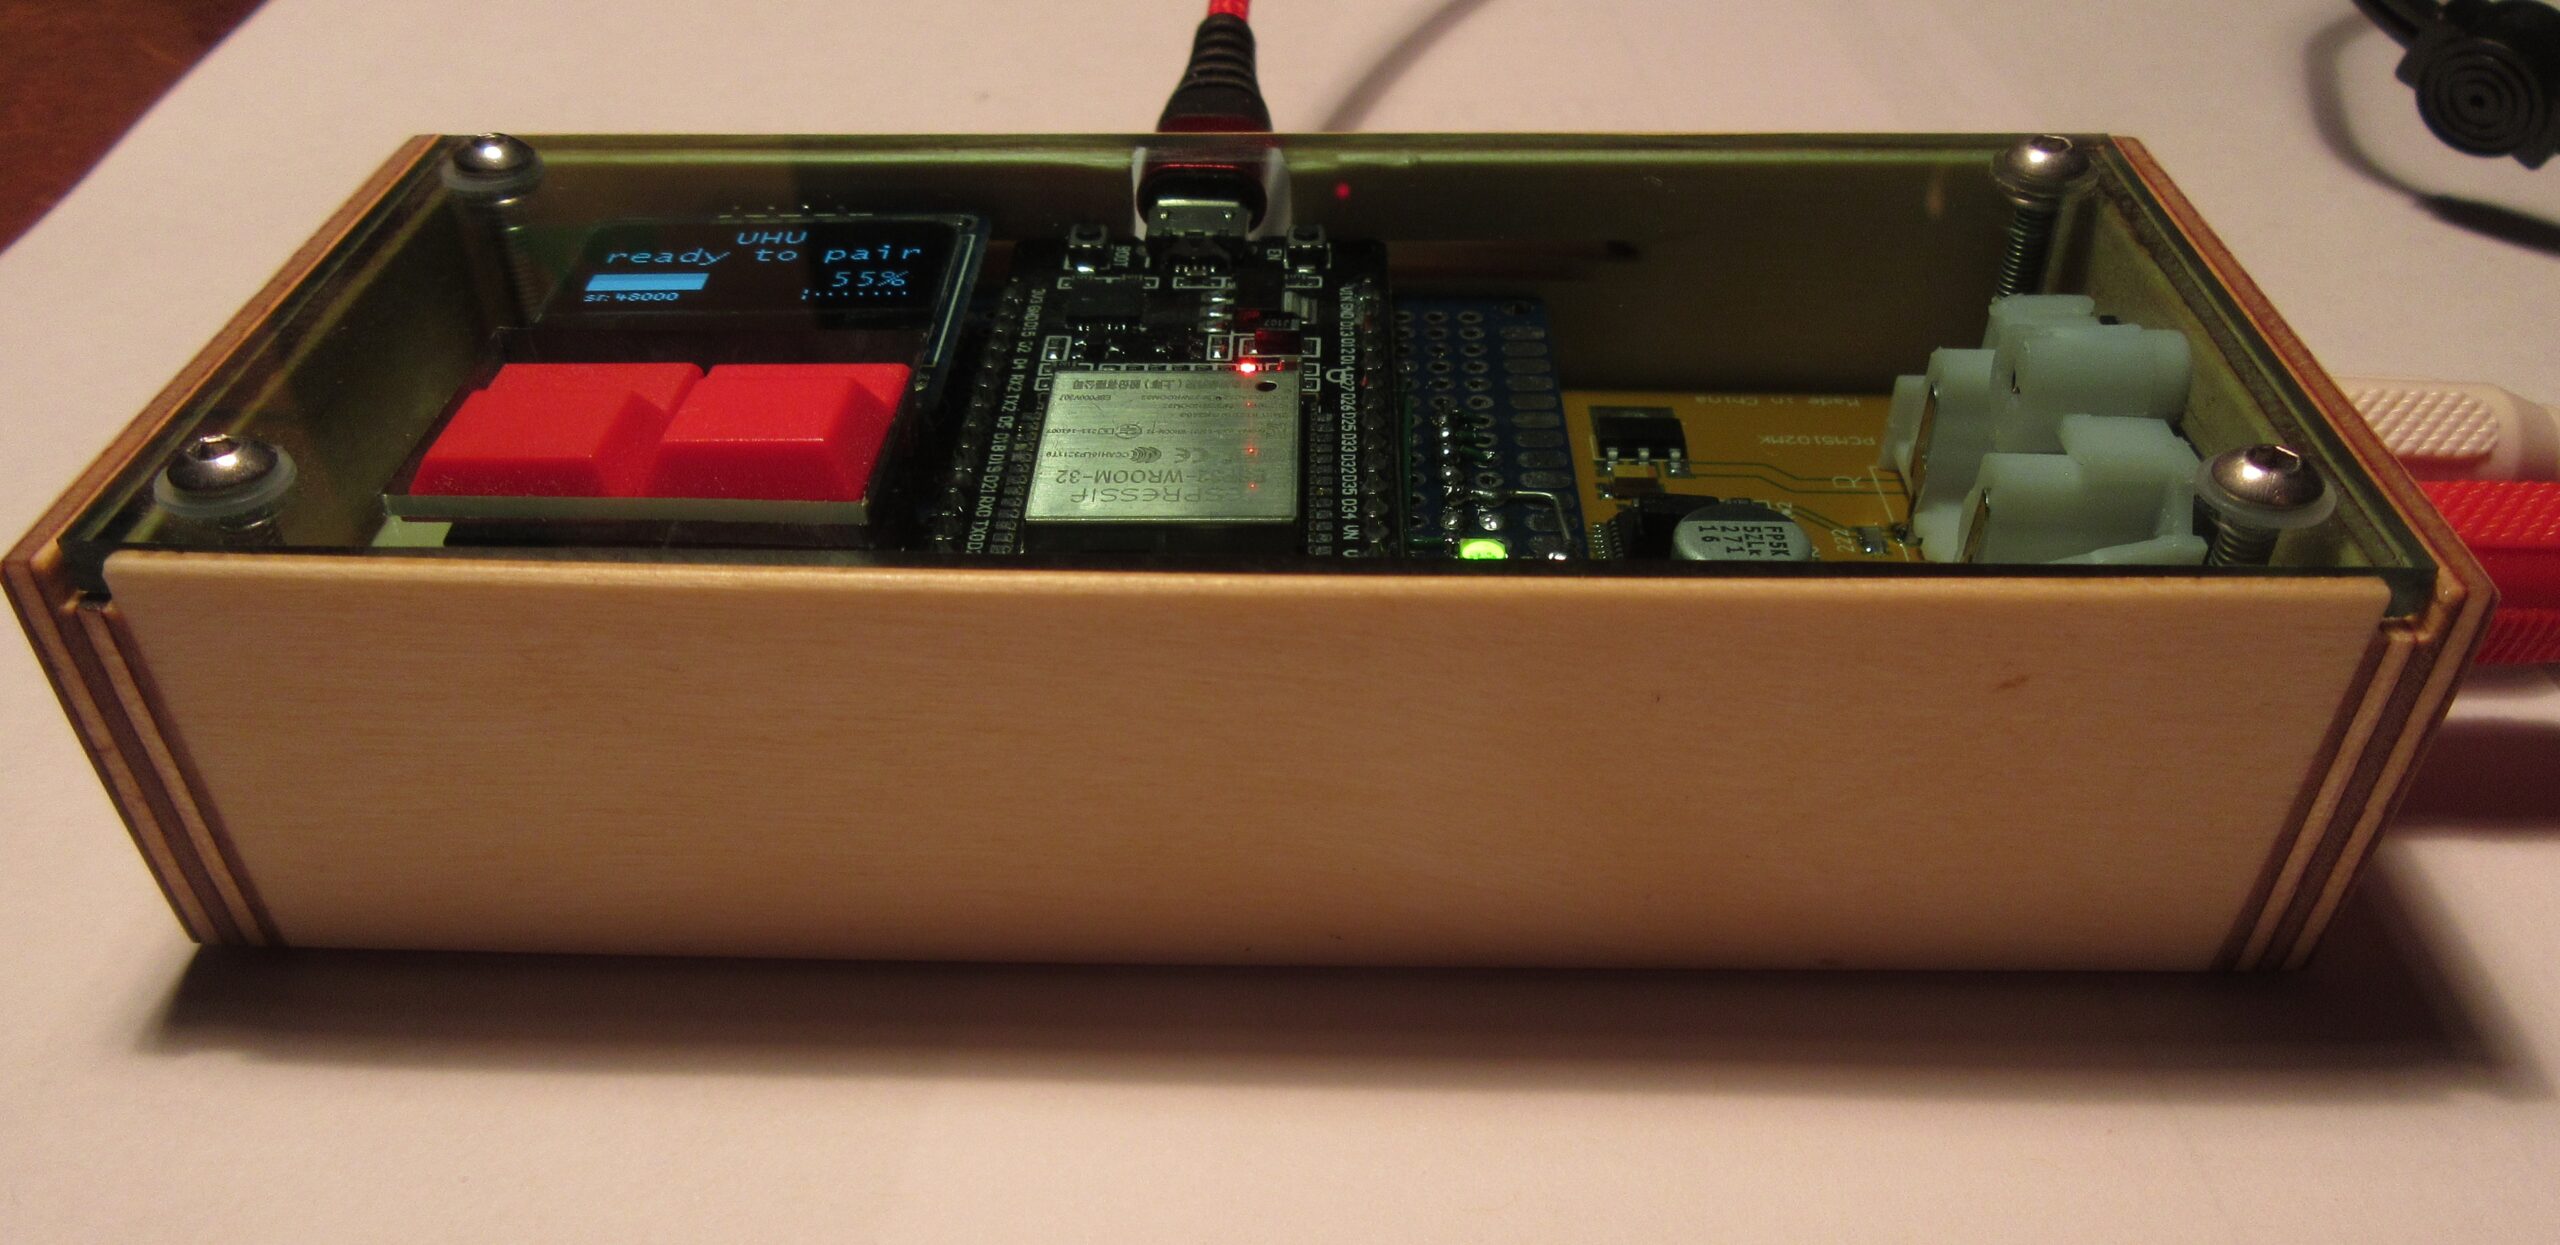
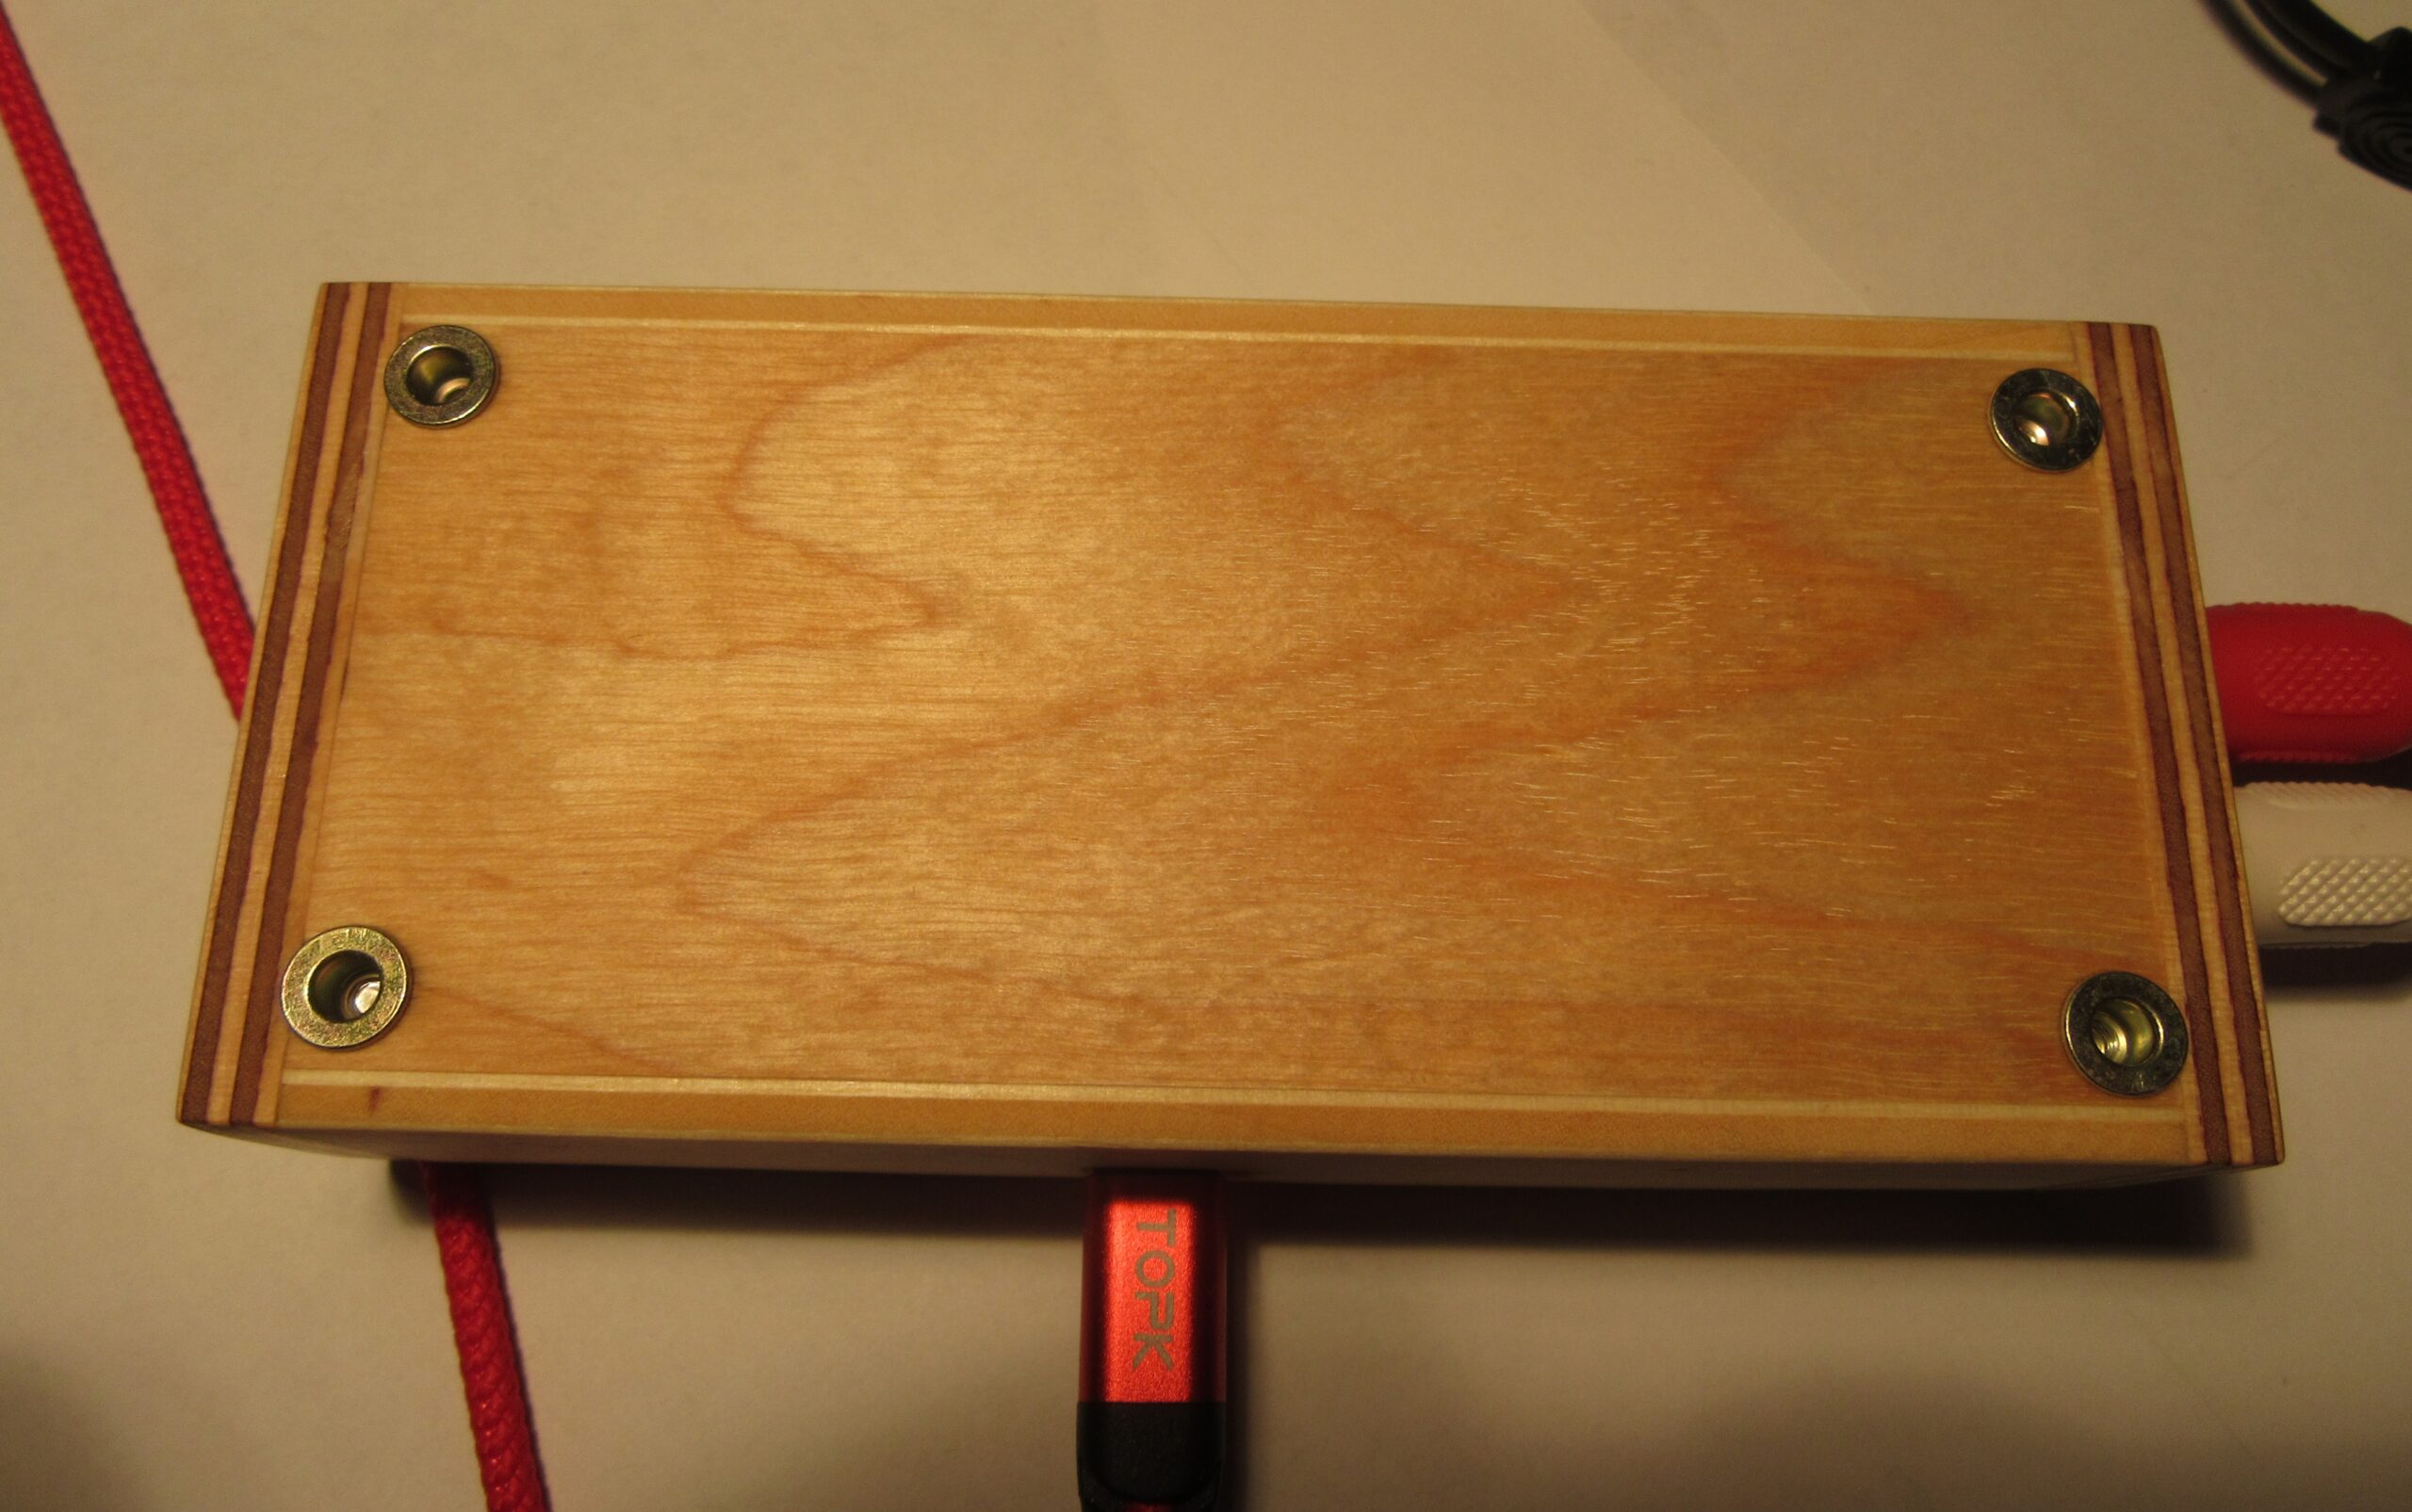
I built a small housing from glued plywood scraps, which has become very chic and goes well with the Sony receiver for my taste.

Gehäuse aus Sperrholz - Vorderseite

Gehäuse aus Sperrholz - Unterseite
case made of plywood, front and bottom

Software

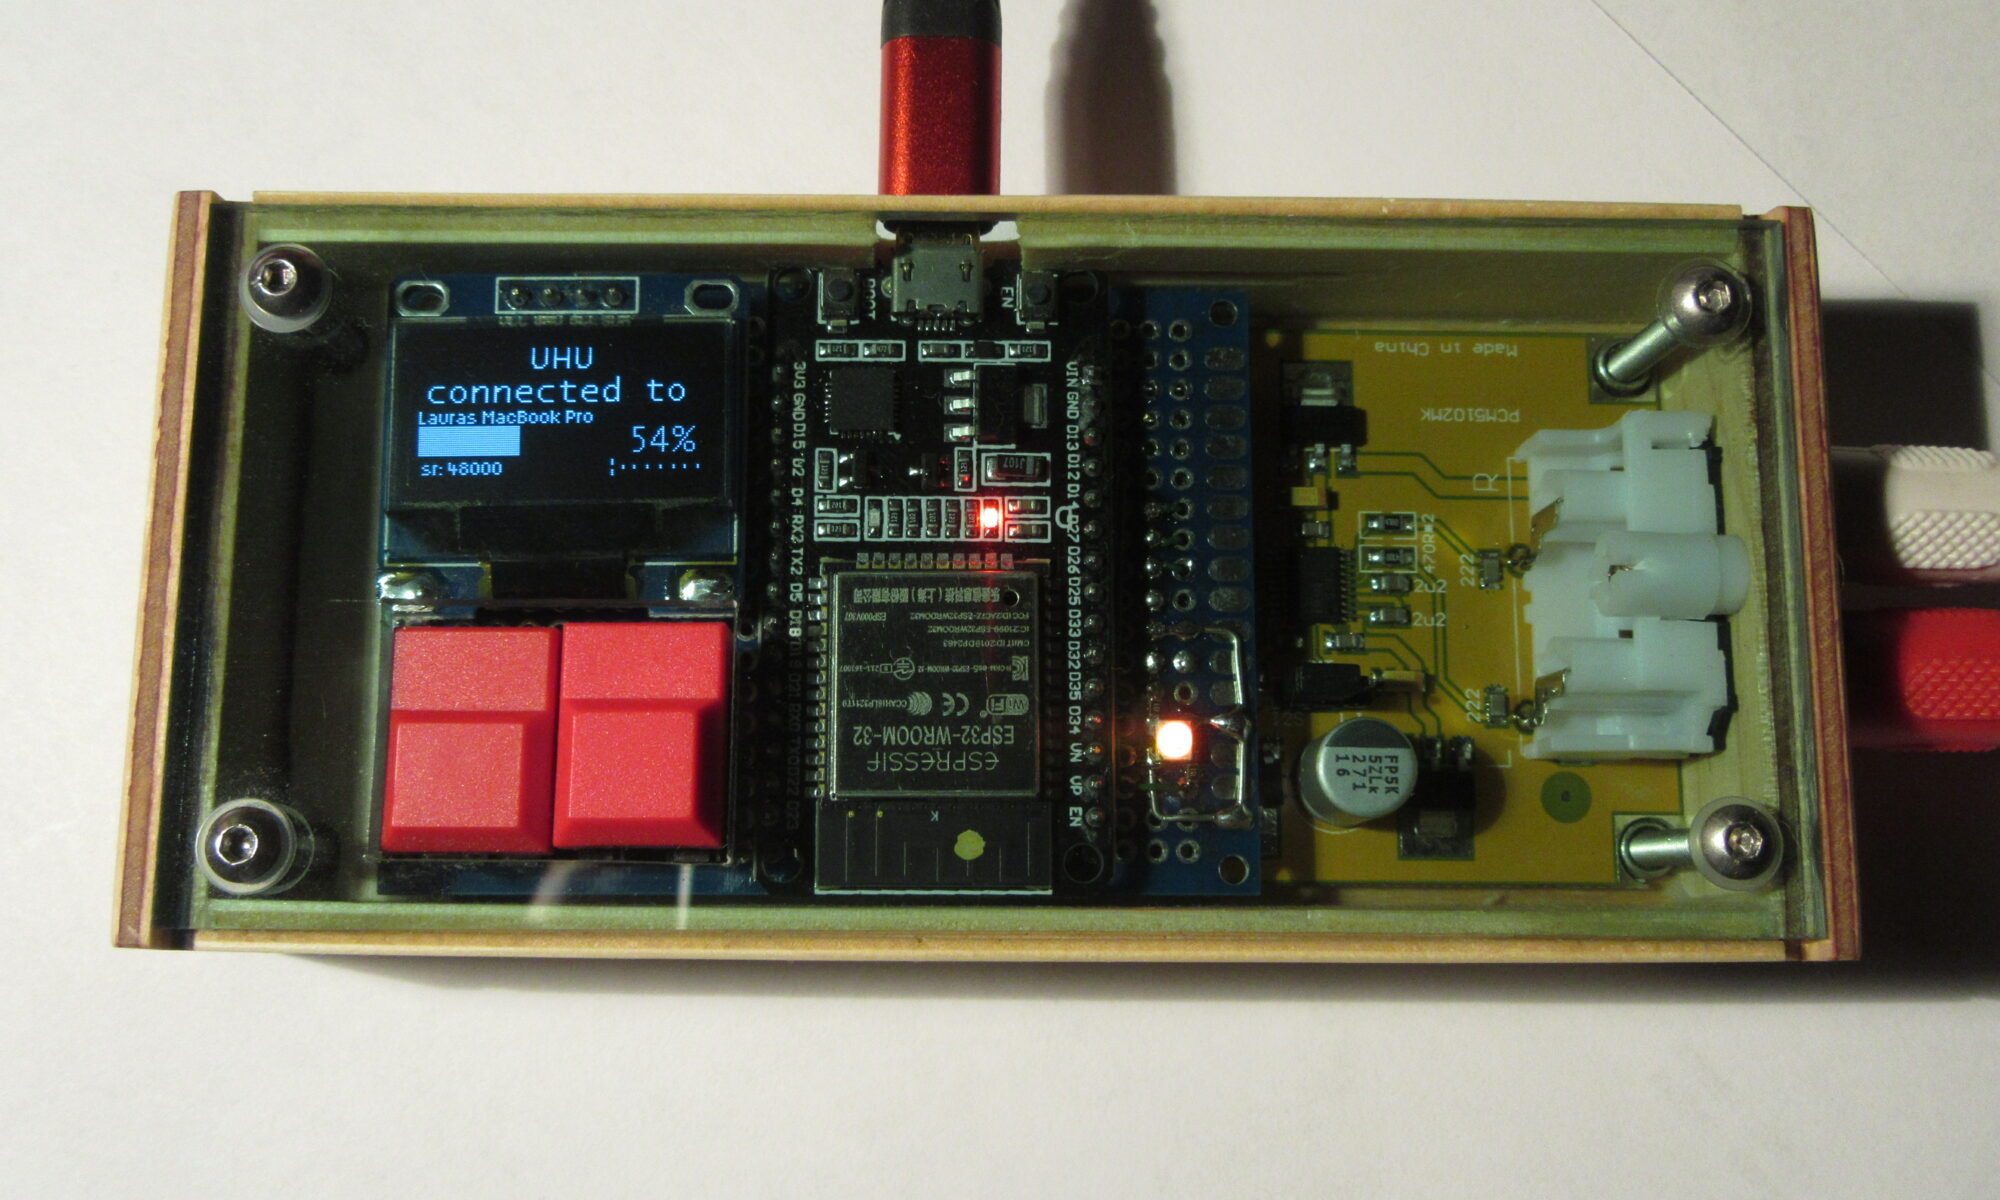
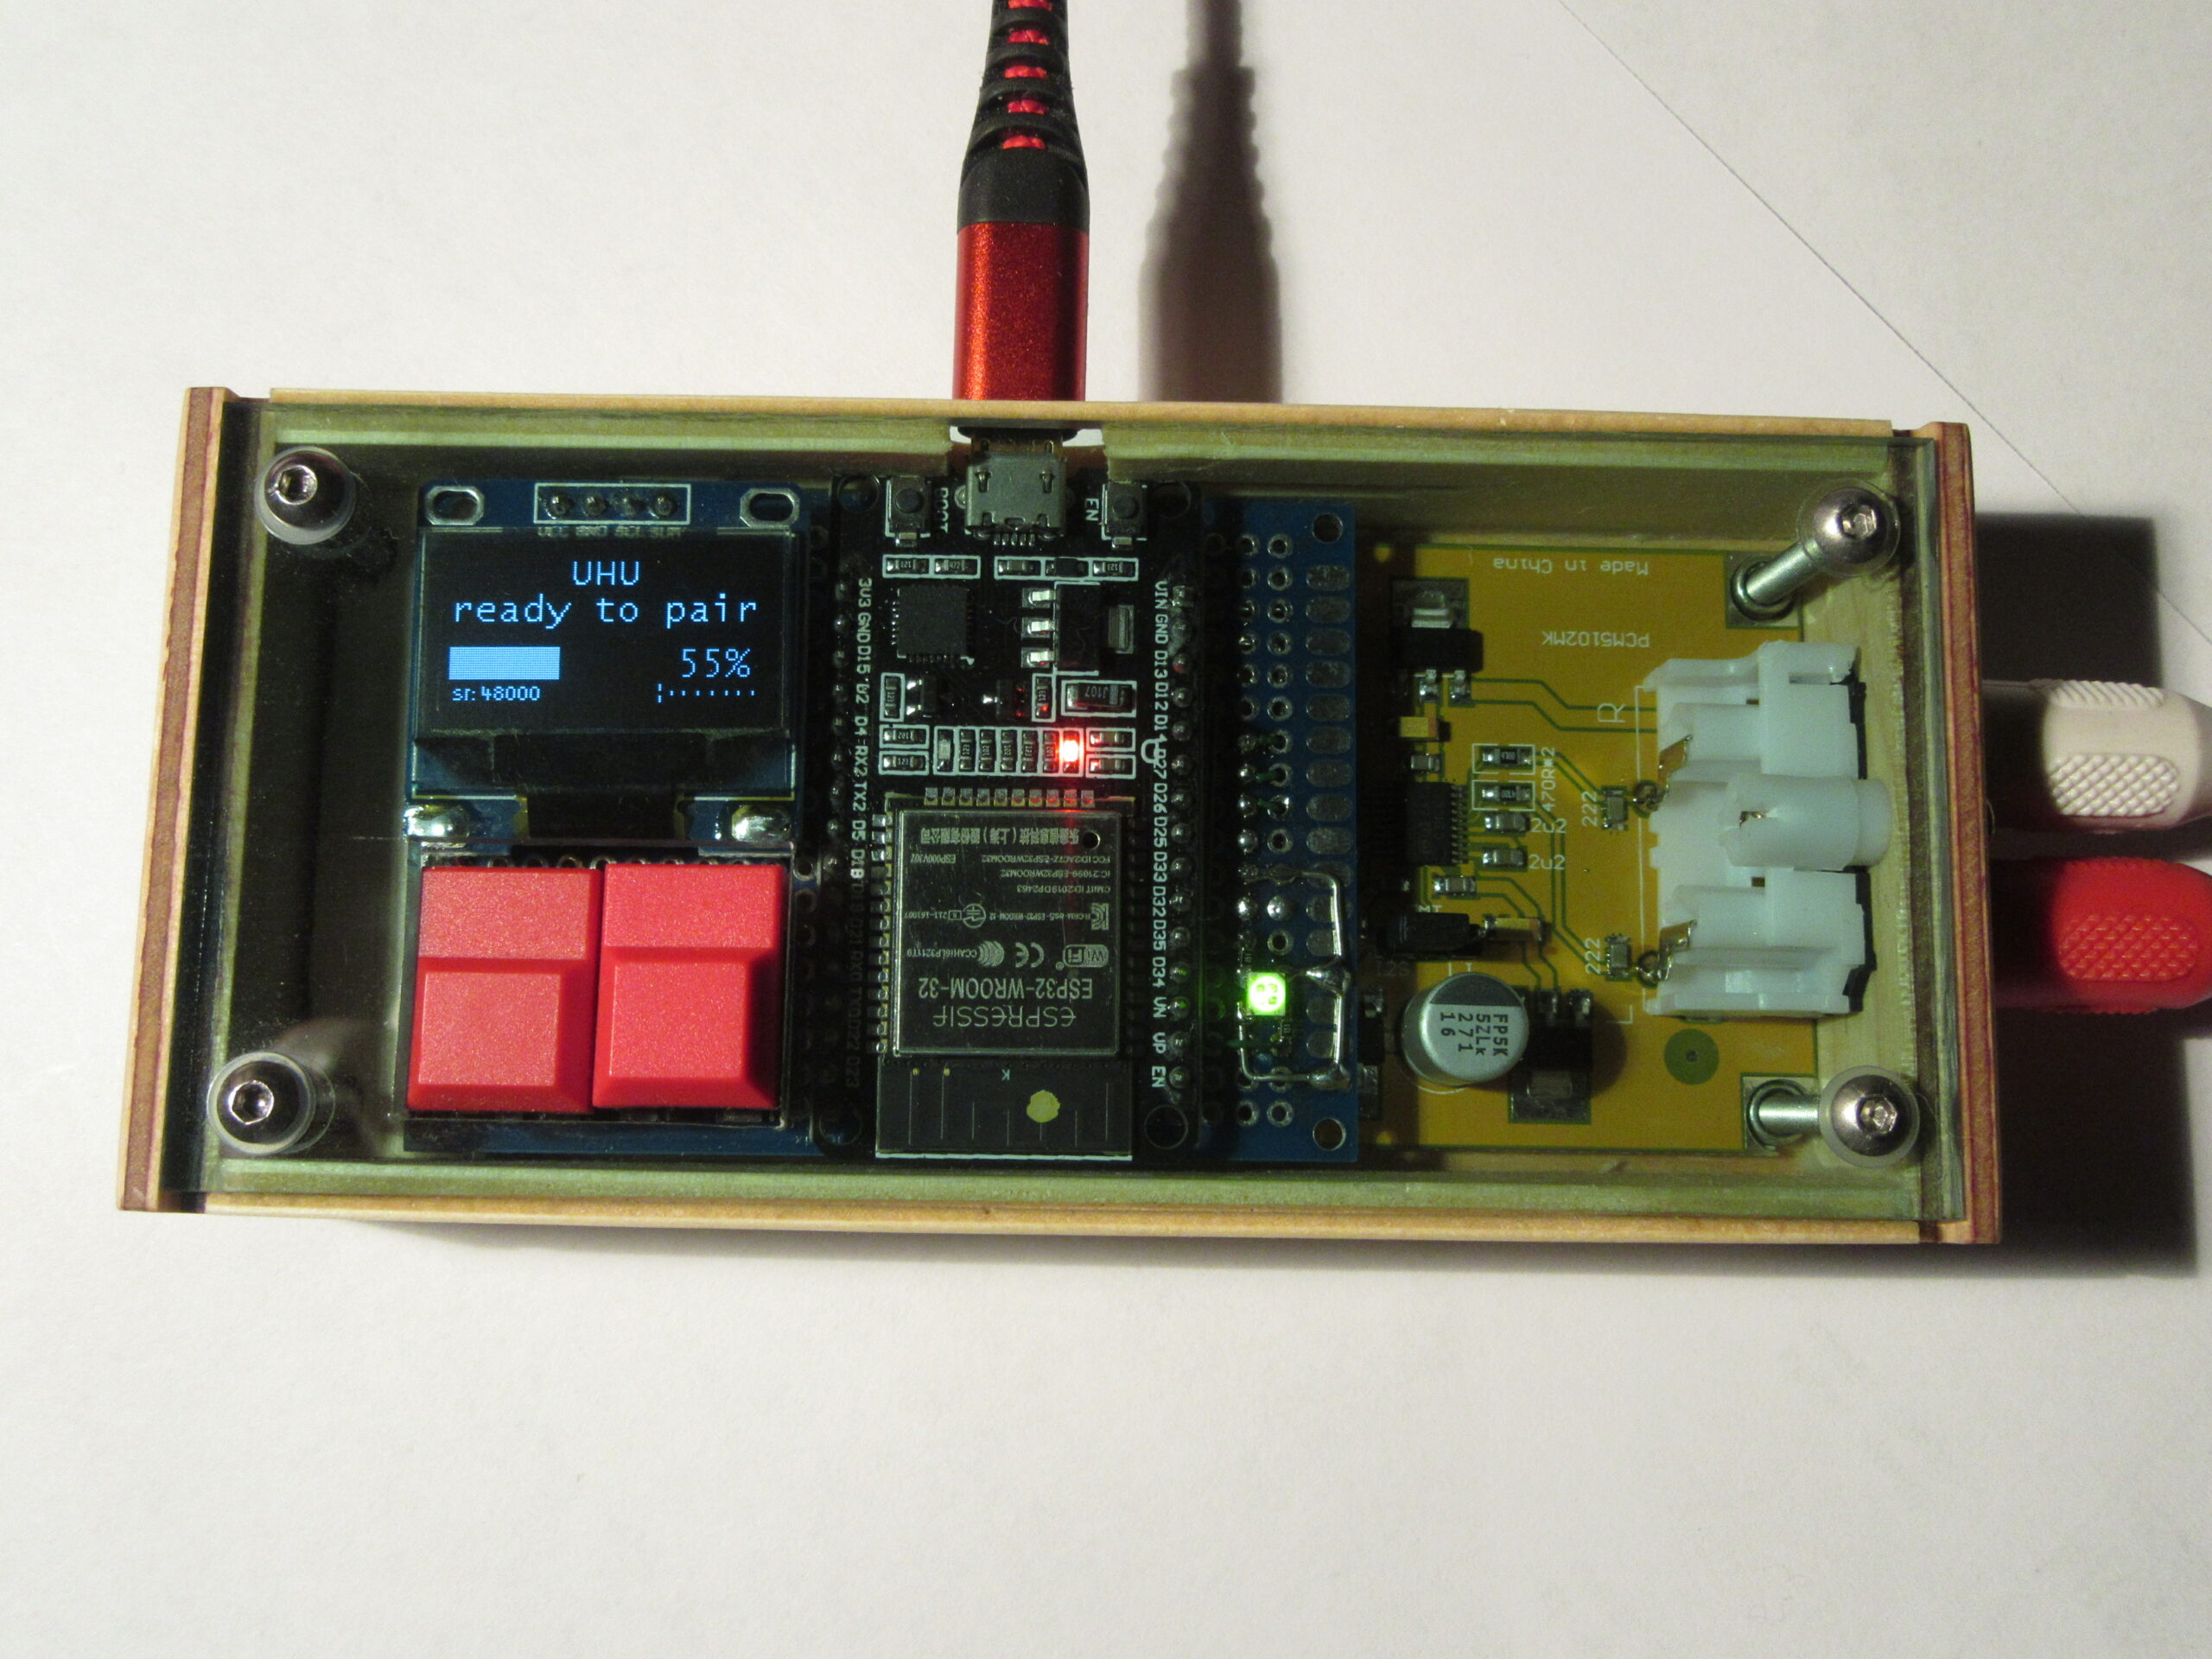
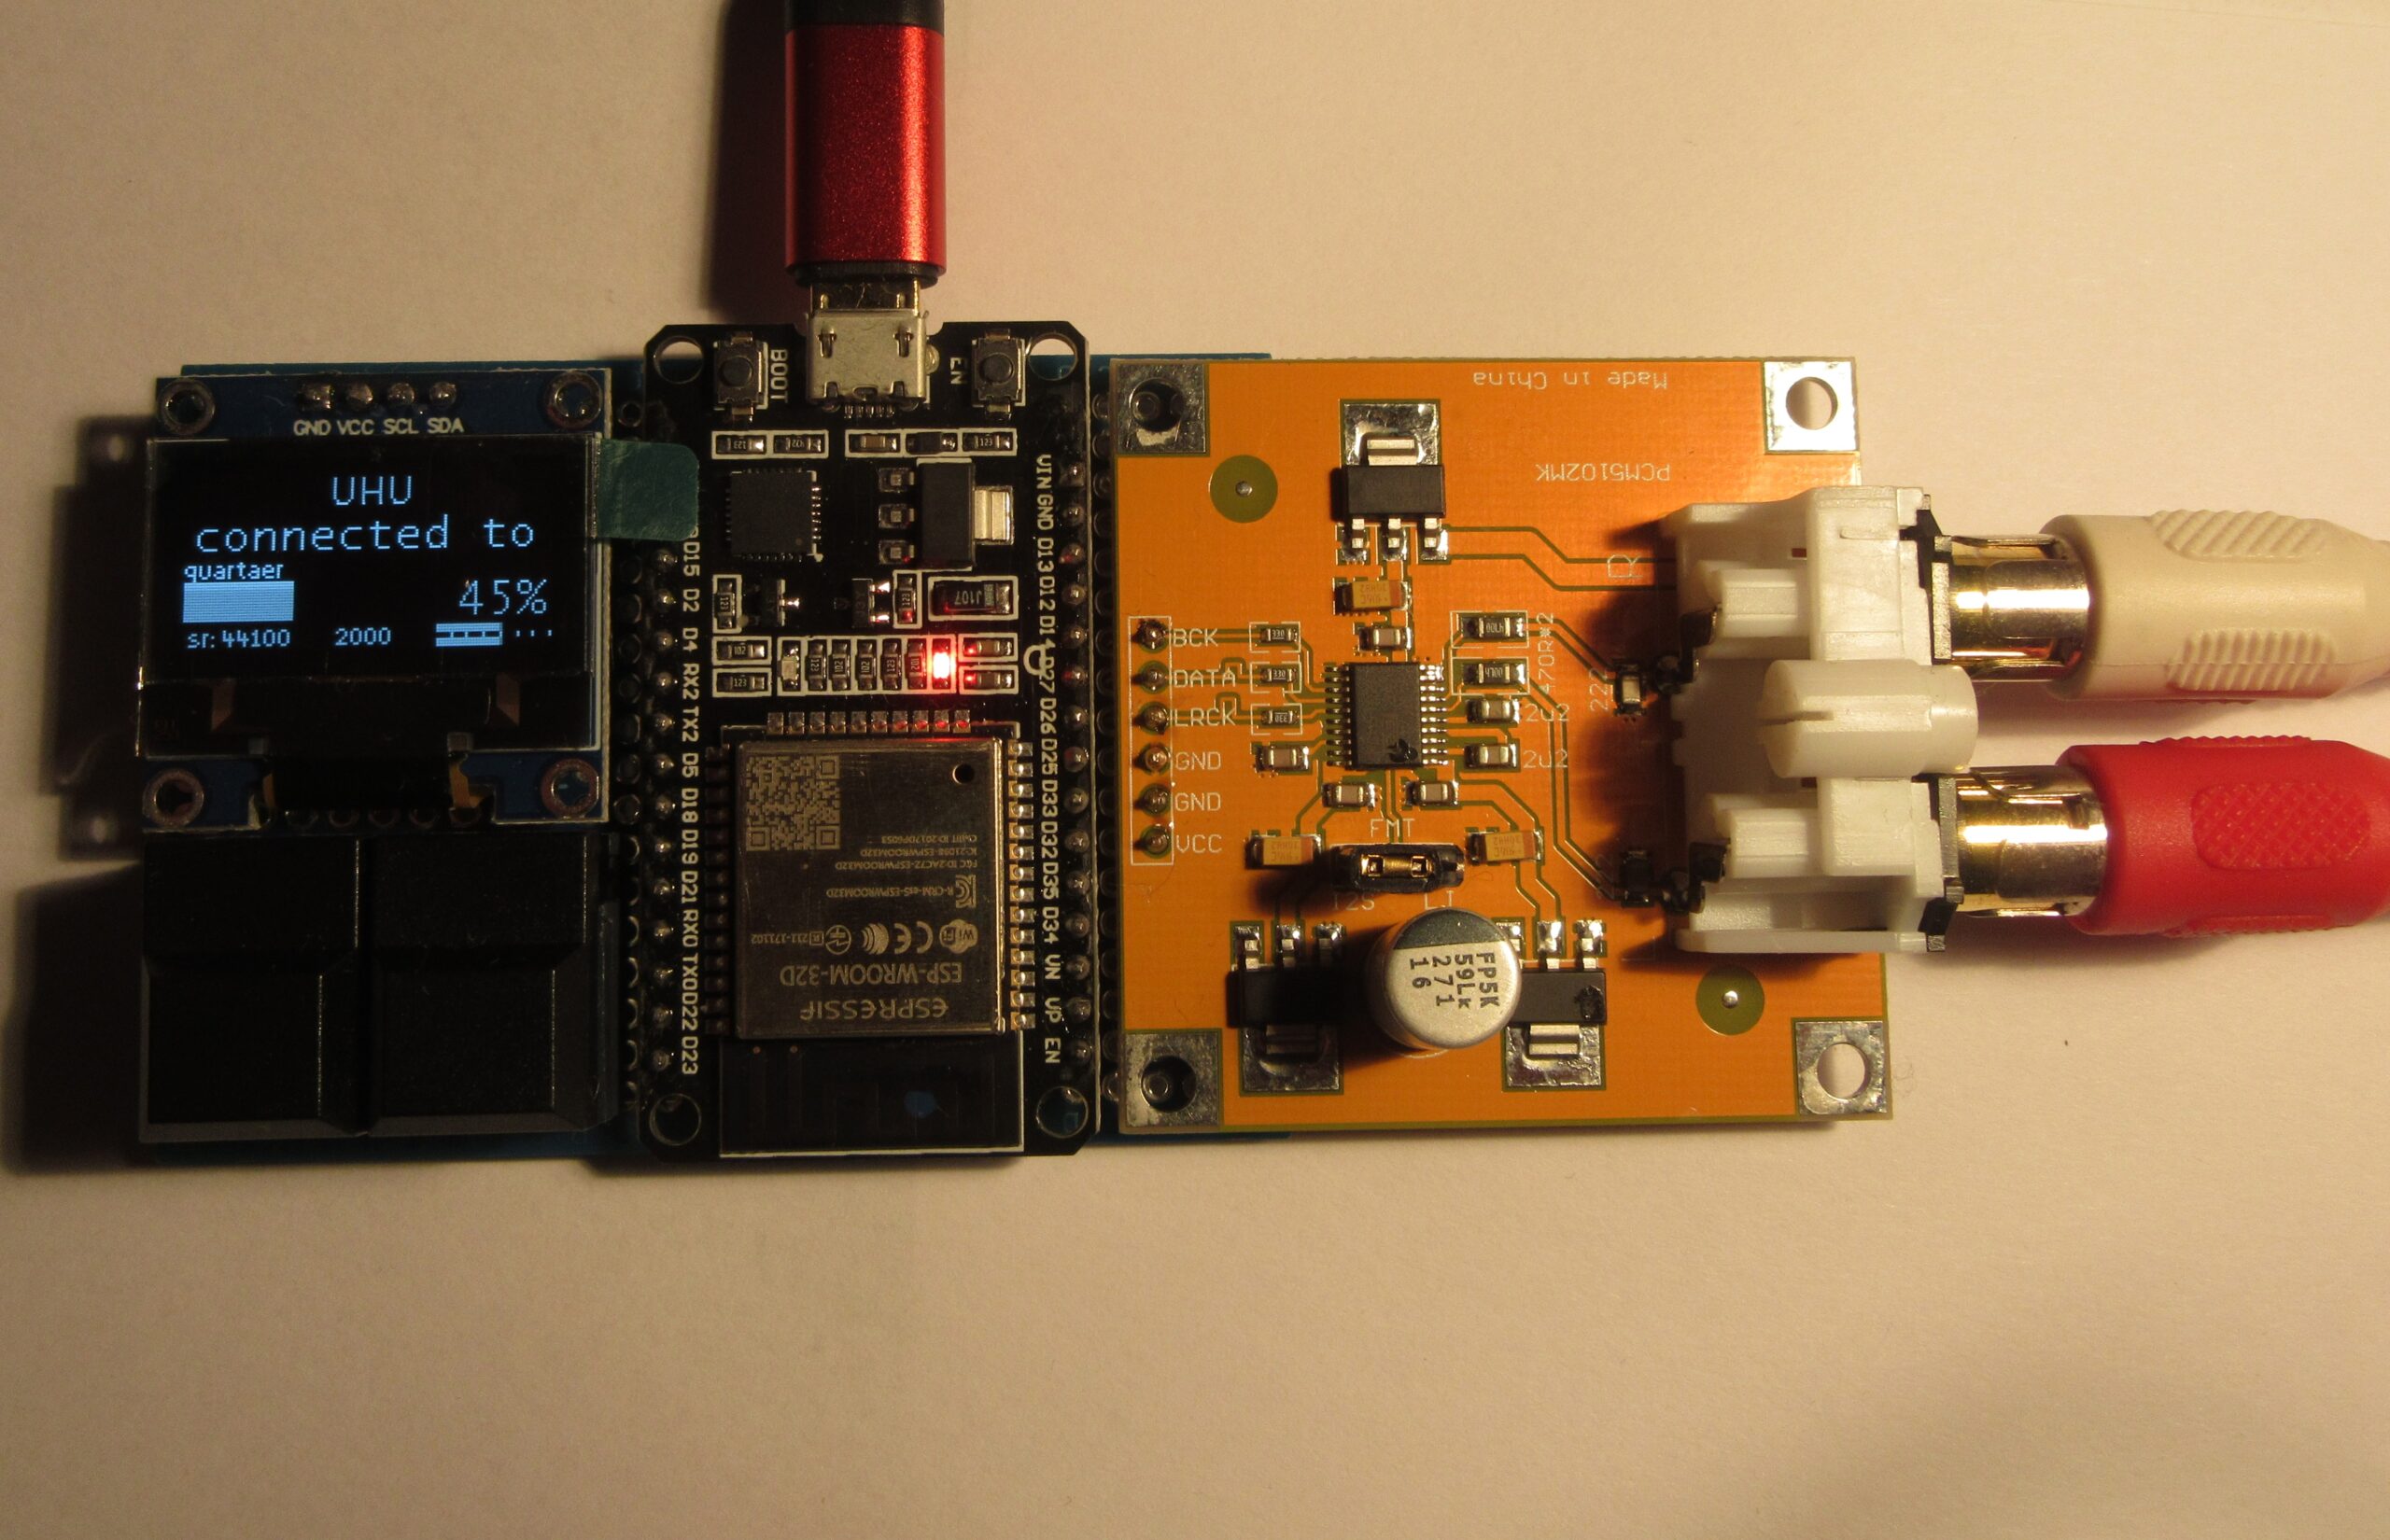
The software is derived from the example “A2DP-SINK” from the ESP32 manufacturer Espressif. That shortened the development time a lot for me, as the complete and rather complex Bluetooth communication is already implemented in the example. I added processing of the audio samples for volume control and the conversion from 16 to 32 bits as described above. I also added the routines for the OLED display. The operating status, the connected device and a logarithmic level display are shown on the display.

In the end, the programming and troubleshooting took a lot longer than a weekend, as a lot of bugs had to be found and fixed.

I have published the full source code, the instruction manual and guidance for compiling the project on Github.

https://github.com/uhucrew/bt-receiver-pcm5102a


Receive updates directly in your inbox

Loading

Digital Audio Volume Calculation

Kurven geeigneter Lautstärkefunktionen

I recently put together a Bluetooth audio receiver as a weekend project. At some point I got to the point of regulating the volume and had to realize that it is not that easy to do it well. As always, I researched the Internet for a while, in the end I had to experiment myself, true to the motto that you can’t program anything sensible that you don’t understand.

Volume and hearing

Our ear is an impressive organ. The audible range from the softest sound to the greatest noise spans about 6 decades. This means that the slightest sound is a million times quieter than the loudest we can hear. Since there is no physical upper limit for noise, the volume of hearing is set as the maximum, which we can hear for a short time without permanent damage.

Another important fact is that we can differentiate quieter sounds much better in terms of volume. This is noticeable in the fact that we can hear differences in volume very well with soft tones. The louder it gets, the less we notice a change.

This results in the following requirements for a good volume control: In the quiet area you have to be able to set very precisely in very small steps. The louder it gets, the bigger the steps and the change.

Of course, this was already known almost 100 years ago, and volume controls or potentiometers with a so-called logarithmic curve are built into even ancient analog electronics. On old potentiometers, for example, there is still “100kΩ log” for 100 kiloohms with a logarithmic course or e.g. “1M lin” for 1 megaohm and a linear course. On current models, the gradient is usually identified with the first letter:

    • “A20k” corresponds logarithmically, 20kΩ
    • “B2k” means linear 2kΩ
    • “C50k” means anti-logarithmic 50kΩ

With the advent of digital technology, however, some engineers did not do their homework and there are many (digital) devices in which the volume control does not work properly. Often the gradation in the lower range is too coarse, sometimes there are too few levels with 32 or even fewer setting levels.

Comparison of different functions

As far as I know, a logarithmic curve for a volume control or a potentiometer is not exactly mathematically defined. According to the data sheets of some manufacturers, the resistance curves are partly linear with smooth transitions. For example, a manufacturer of high-quality audio potentiometers (Alps Alpine) has a curve with three linear ranges; flat up to almost 25%, a little steeper up to 65% and very steep at more than 65% angle of rotation.

ALPS_RK271_curves
source: https://tech.alpsalpine.com/prod/e/pdf/potentiometer/rotarypotentiometers/rk271/rk271.pdf

One could of course relate to this digitally, but that would be relatively time-consuming. A math function is of course much easier to program.

The desired curve shape, i.e. flat at the beginning, steep at the end, follows more of an exponential function or power functions. The higher the potency, the flatter the rise in the lower area and the steeper at the end. I tried different functions, first displayed the curves, then tested them by ear.


Kurven geeigneter Lautstärkefunktionen
Curves of suitable volume functions

Optimal function

Judging by my ear, the function y = x³ has proven to be optimal. I also add a small offset so that the regulation begins in the lower range around the hearing threshold.

Calculation of the volume

To regulate the volume of digital audio data, a factor is normally used by which each audio sample is multiplied. If you work with floating point numbers, the factor is usually between 0 and 1. With fixed point arithmetic, the factor can be completely different. In the following an example as a C code, where the volume factor is a 16 bit value between 0 and 65536 and is calculated with the function y = x³.

If you multiply this value by 16-bit audio samples, you get 32-bit values as the result. I use this in a Bluetooth receiver, where 16-bit audio is received via Bluetooth and, after volume calculation, is output to a 32-bit PCM5102A D / A converter without loss of quality.


#include <stdint.h>
#include <stdlib.h>
#include <math.h>

//use x^3 function
#define VOL_POWER 3.0
//upper/lower limit of factor to multiply with samples
#define VOL_MIN 30.0
#define VOL_MAX 65536.0

//precalculate constants once
static const float vol_pow_min = pow(VOL_MIN, (1.0 / VOL_POWER));
static const float vol_pow_diff = pow(VOL_MAX, (1.0 / VOL_POWER)) - pow(VOL_MIN, (1.0 / VOL_POWER));

//calculate volume factor with power function
//argument vol: 0..100%
static uint32_t vol_calc(uint8_t vol) {
    if (vol == 0) return 0;
    if (vol >= 100) return VOL_MAX;

    return floor(pow((vol_pow_min + vol_pow_diff / 100 * vol), VOL_POWER));
}

As a little calculation aid and for your own experiments, my table with the series of numbers and experiments can be downloaded here: volume_calc.ods


Receive updates directly in your inbox

Loading

Weekend project: bat detector

Since ages I observe lots of bats in the evening and I’m interested in there specific style of orientation and communication. Two weeks ago I had some leisure time to build my own bat detector.

I wanted to build a prototype on a stripboard only and investigated to find a premade circuit. A short internet enquiry showed up a bunch of instructions. After some reading and checking my stock of components I decided to go for a simple analog circuit built around one 4xOPV LM324N.

block diagram

The principle is similar to a superheterodyne receiver. The high frequency input is amplified by about 140.000x and mixed with an oscillator signal to an audible frequency range. The concept of a frequency mixer is comprehensive described at Wikipedia. I implemented only a few modifications in the circuit. So I replaced the 62kΩ resistor in amplifier stage two with an 68kΩ type which increased amplification marginally. Additionally I used a 100kΩ potentiometer because I hadn’t a 50kΩ pot available. The entire circuit without the modifications is available here:


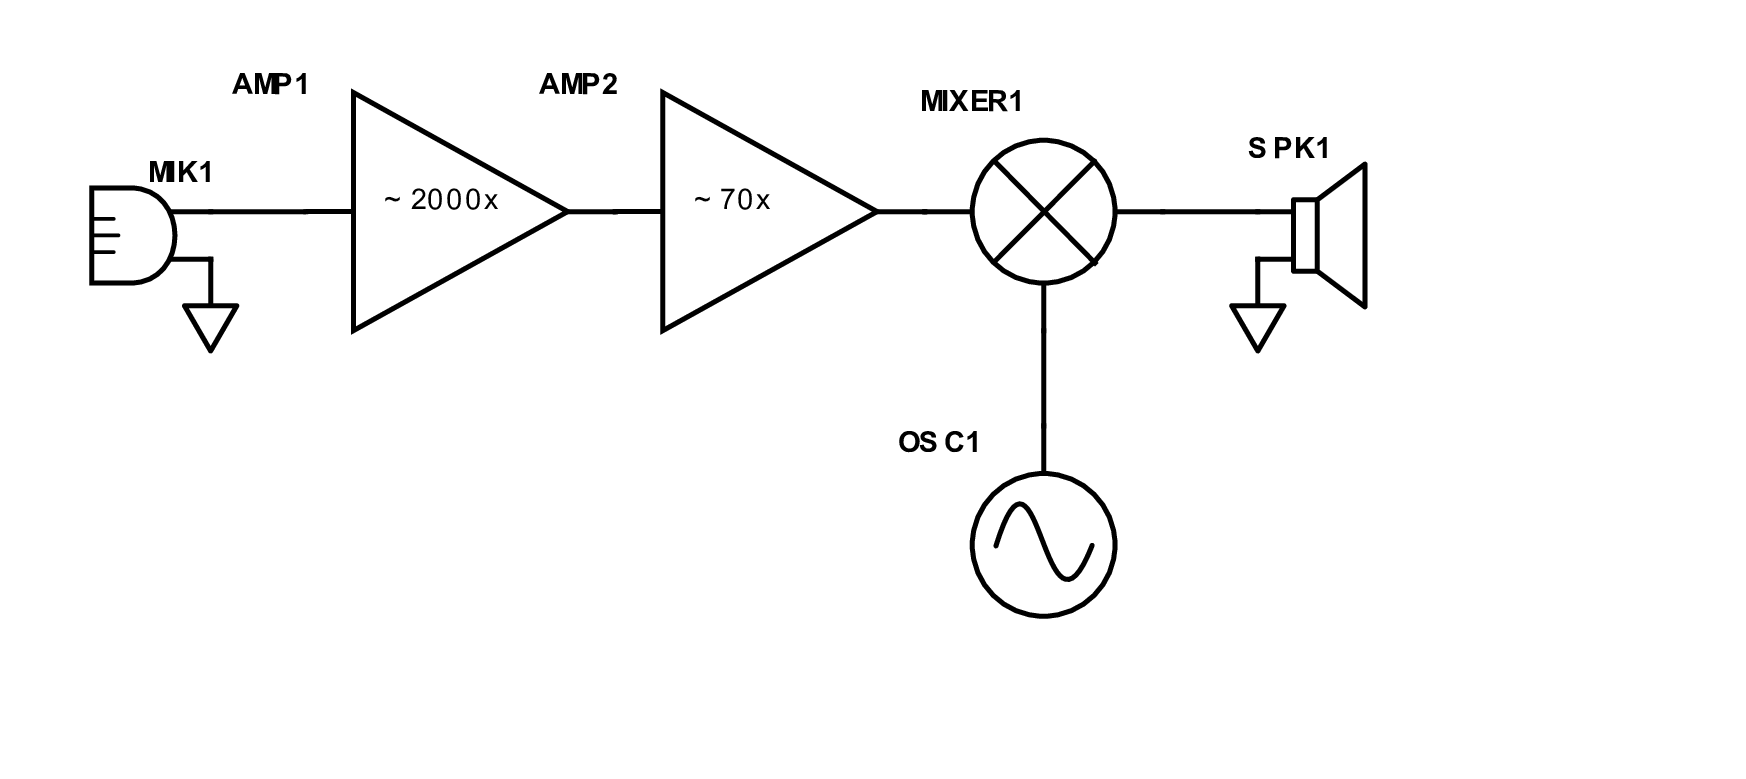
Bat Detector, Source: https://www.nutsvolts.com/

The abovementioned page marvellous describes some background information about bats and the detector which are essential. To use the detector right it’s needful to read the article.

Hereafter is a small picture story that shows the construction. Because I liked the project I designed an adequate chic case from plywood. The microphone is pluggable to allow experiments with different devices.

case parts, gummed up and oil treated
assembly done
stripboard top view
stripboard bottom view
battery compartment
ready for service
microphone (piezo buzzer)

The first trials indicated that patience is needed to hear a bat. The noise is soft and it can can only picked up if the mammals heading is towards your position. In a patio in Berlin where five to ten bats circling during dusk you luckily hear every quarter hour a kind of rhythmic giggle.


Receive updates directly in your inbox

Loading

AVR based RS232 controlled dimmer

Warning

This circuit is operated with mains voltage and some parts are directly connected to line power. So it is only intended as an example for experienced hobbyists.

Description

With this device you can switch or dim a 230V load (up to 1000W) with serial commands documented here.

foto of the prototype

The circuit uses an Atmel ATTINY2313 controller with well documented firmware written completely in AVR assembler. Beside the dim and switch once functions flexible timers can be used to switch on and off in a cycle, once or repeated. However after power loss all timers are reset and have to be reprogrammed. More details you can find in the serial protocol description.

With the ATTINY2313 builtin analog comparator the zero crossing of the mains AC is detected to fire the Triac at the right time.

The source code is provided under the GNU General Public License (GPL) and can be downloaded here. An already assembled version in hex format is here available.

project goals

  • simple, clear text commands can be invoked from a terminal
  • cheap parts, neither transformer nor RS232 isolation IC used
  • intelligent autonomous cyclic and single switching functions

The schematics is provided under the GNU General Public License (GPL) and can be downloaded here.

ATTiny2313-dimmer.sch_.pdf


A verified 2-layer printed circuit board layout is available too.


Receive updates directly in your inbox

Loading


AVR 1-Wire slave with DS18B20 temperature sensor

This project demonstrates a complete 1-Wire slave implementation to connect a 1-Wire temperature sensor with local display to the 1-Wire bus.

foto of the prototype

The central part of this circuit is an ATTINY45 controller. The controller is both 1-Wire slave and master. At the master side is a DS18B20 1-Wire thermometer connected. A DS18S20 may be used as well. At the slave side the controller acts exactly as the connected DS18B20. There are two shift registers connected to the controller to drive a 3 or 4 digit multiplex display. The actual firmware drives three digits but can simply adjusted for one digit more.
The ATTINY45 does temperature conversion in a loop and displays the actual value at the local display. For the sensor parasite power is used, so a conversion takes little less than one second. But on the 1-Wire slave side the ATTINY45 delivers immediately the last conversion result. No wait for conversion is needed.
As surplus the internal 2048 bits EEPROM of the ATTINY45 can be accessed from 1-Wire bus with the standard commands for iButtons. It may be used to store minimum and maximum or mean values.

The source code is available here.

project goals

  • display temperature near the sensor
  • assimilable into existing 1-Wire systems without change of software
  • acts like a standard temperature sensor 1-Wire slave
  • no wait for conversion needed when reading temperature
  • additionally EEPROM accessible with iButton protocol

The schematics is available for download here.

1wire-slave-temperatur-schematics


Receive updates directly in your inbox

Loading